WCF Service on Top Of SharePoint 2016

In this post, I’m going to discuss about WCF service and how it can be developed on top of SharePoint. WCF service works as an individual component that can be hosted on any environment and has no platform dependencies. WCF service plays a major role in SharePoint app based development model by enabling access where the SharePoint app has limited access controls. Let’s see how we can develop WCF service on SharePoint through a custom solution on Visual Studio. But before that I would like to introduce WCF and it’s building blocks. What is WCF? Windows Communication Foundation(WCF) is a framework launched by Microsoft with the release of .Net 3.0. The two main building blocks for WCF services are – distributed and interoperable: Distributed In this concept the application components run on different servers through network. It mainly gets used for better scalability of the server. A web application which is running on one machine can leverage the WCF service hosted on some other server. Interoperable Interoperable means the application can communicate with any other application with different platform, so there’s no platform dependency. Previously .Net remoting service was getting used but only with the .Net applications because of which Microsoft came up with WCF services to overcome platform dependencies. WCF On SharePoint 2016 Here I’m sharing the steps to develop WCF service on top of SharePoint 2016: Step1: Open Visual Studio 2015 and create new SharePoint 2016 empty project. Step 2: Name the project as SPWCFService and click OK. Step 3: Provide the SharePoint web application URL and select Deploy as Farm solution radio button. Step 4: Add following references on solution: a. Microsoft.Office.Server.UserProfiles b. Microsoft.SharePoint c. Microsoft.SharePoint.Clieint.ServerRuntime d. System.ServiceModel e. System.ServiceModel.Web f. System.DirectoryServices g. System.Configuration Step 5: To create the service, add our Layouts folder in solution. Write click on Project and select Add > SharePoint ‘Layouts’ Mapped folder option. Step 6: Once Layouts folder gets added Add one txt file in it named as ‘SPService.txt’. Rename the it as .SVC. Step 7: Add the following line of code in the SVC file we have added in the last step: @ServiceHost%20language=%22C#”>%@ServiceHost language=”C#” Factory=”Microsoft.SharePoint.Client.Services.MultipleBaseAddressDataServiceHostFactory, Microsoft.SharePoint.Client.ServerRuntime, Version=15.0.0.0, Culture=neutral, PublicKeyToken=71e9bce111e9429c” Service=”SharePoint. SPWCFService.Sample.Code.SampleService” Step 8: Now let’s add one folder in the solution named as ‘Code’ and add two classes in it named as ‘ISampleService.cs’ and ‘SampleService.cs’. Modify both the classes with the below code in it: ISampleService.cs using System; using System.Collections.Generic; using System.Linq; using System.Text; using System.Threading.Tasks; using System.ServiceModel; using System.ServiceModel.Web; namespace SharePoint.SPWCFService.Sample.Code { [ServiceContract] public interface ISampleService { [OperationContract] [WebInvoke(Method = “GET”, ResponseFormat = WebMessageFormat.Xml, BodyStyle = WebMessageBodyStyle.Wrapped, UriTemplate = “SampleServiceCall({SampleValue})”)] string SampleServiceCall(string SampleValue); } } SampleService.cs using System; using System.Collections.Generic; using System.Linq; using System.Text; using System.Threading.Tasks; using System.ServiceModel; using System.ServiceModel.Web; using System.ServiceModel.Activation; using Microsoft.Office.Server.Social; using Microsoft.Office.Server.UserProfiles; using Microsoft.Office.Server.Microfeed; using Microsoft.SharePoint; using Microsoft.Office.Server.ReputationModel; using Microsoft.Office.Server.SocialData; using System.Configuration; using System.Security.Principal; using System.Web; using Microsoft.Web.Hosting.Administration; namespace SharePoint.SPWCFService.Sample.Code { [AspNetCompatibilityRequirements(RequirementsMode = AspNetCompatibilityRequirementsMode.Allowed)] public sealed class SampleService : ISampleService { public string SampleServiceCall(string itemId) { string statusResult = “”; try { using (SPSite SpSite = new SPSite(ConfigurationManager.AppSettings[“SiteUrl”].ToString())) { SPWeb cWeb = SpSite.RootWeb; SPList accReqList = cWeb.Lists[“List”]; SPListItem item = accReqList.GetItemById(Convert.ToInt32(itemId)); statusResult = item[“Title”].ToString(); } } catch (Exception ex) { statusResult = ex.Message; } return statusResult; } } } Step 9: As you can see in the above two classes – one is our Interface ‘ISampleService.cs’ and another is declaration class ‘SampleService.cs’ for the interface. Step 10: We also need to modify our Web Application config for an entry of SiteUrl in appSettings as we have used it in our code above ‘SampleService.cs’ class. Step 11: We need to modify the project Assembly Deployment value from GAC to WebApplication. Step 12: Deploy the solution. Step 13: We can make the service call through the below URL and can test the service: http://{SiteUrl}/_layouts/15/SPWCFService/SPService.svc/SampleServiceCall({ItemID}) Step 14: The expected result will be in the below format: And there you are!
Powerful Decision Making with BI

Being in business is being in the business of decision making. Right decisions, made at the right time, and implemented in the right manner—make all the difference. This surely has become difficult. Things change very quickly, we are far more connected, and we need to act fast while grappling with far more complexity. There always seem to be too many things to keep tab on, and too few ways to make sense of it all. ‘Gut feel’ has been a trusted guide, but it is no longer dependable. Rapidly changing contexts, with unfamiliar cause and effect networks, mean that we need to be far more equipped while making decisions. Studies show that the highest performing businesses leverage data effectively for decision making. With speed becoming a key element of business strategy, decision making has spread temporally. We require instant access to relevant information, whether on the plane, while having a coffee or between meetings. We need to be able to analyse that in real time, with an understanding of changes that are likely to occur in the future. We have to act on these quickly as well—gather opinions, mobilize teams, align their activities. This is not limited to just a few roles in the organization. At all levels, people need to make decisions—be accountable and confident. And if organizations can enable its employees with right tools—chances are that they will get it right! That’s the charter for the business intelligence (BI) implementation in an organization. Employees must have access to data from all relevant sources, in a way that makes sense to them in their context. And, that should be available at all times regardless of location or device they are using. Of course, this must be done in a manner that security and access rules are not compromised. Informed decision making relies on current and comprehensive information. Relevant information often reside in a multitude of sources—a plethora of databases, documents, spreadsheets, social networks, or web. Access to data models which bring together these sources in a meaningful manner allow decision makers to be equipped with timely information and be not blindsided. There can be too much information, though. Only through right visualization and summarization, we can understand and analyze it well—generating insights as we draw conclusions. This happens when we are able to visualize information as relevant to the business model. Insightful tools can identify patterns, allow us to analyze scenarios, and plan better. These insights influence decisions in a powerful manner. Making a positive impact towards our goals require that we act on our decisions effectively. BI can be a key tool making it easy to take actions, involve people, and align teams. Working with information effectively requires collaboration and involvement of relevant people. With scorecards at all levels, everyone in the organization gets aligned to the strategy and maintains focus on the goals. Powerful decision making is about being able to be confident and accountable. Decisiveness that works comes from being informed, insightful and impactful. The confidence that arises from comprehensive information, deep understanding and ability to implement, leads to results. To understand more about making informed, insightful and impactful decisions, View the webinar recording on ‘Making powerful decisions with BI’ BI and Analytics Adoption and Usage Report Download Now
How to create and deploy Word Add-on in SharePoint

Office add-in deployment with Com add-in is a tedious task. The Com add-in package has a .msi file or an executable file that requires software deployment interface, and requires pushing the add-in down to every computer using System Center Manager. It gets drearier when there are updates in the add-in, and those are to be pushed on every computer again. To overcome this, a new Office add-in programming model is available for extending Office applications using the JavaScript APIs. Add-in can be quickly built and can be associated with the task pane with the Office products like Word excel, or PowerPoint. In this post, I will explain how to create Word add-in in the SharePoint. These are the basic steps: Create the SharePoint page in pages/site pages’ library. This page will interact with the Word add-in Create the manifest file and add the SharePoint URL in the manifest file Add the manifest file in Office app catalog/network drive Add add-in to the document present in the document library To overcome this, a new Office add-in programming model is available for extending Office applications using the JavaScript APIs. Add-in can be quickly built and can be associated with the task pane with the Office products like Word excel, or PowerPoint. In this post, I will explain how to create Word add-in in the SharePoint. Create SharePoint page Create a SharePoint page in pages/site pages’ library with the name AdWordAddin.aspx. This page has the required office.js, custom js, which will fetch the data from SharePoint list and libraries. This page will open in the custom task pane that is associated with the Word add-in. When the SharePoint page opens in the task pane, it will work in the same context as SharePoint. Create Manifest file Create the manifest file with the below XML. Replace the default URL with the SharePoint page URL created earlier. Save the file as AdAuthoring Smart Panel.xml Deploy the Manifest file on Office App catalog Click on O365 icon and select Admin Navigate to the Admin Center->SharePoint. On the left navigation, click on the App and select App Catalog. Using this, create the new app catalog site collection on SharePoint Once the app catalog site is created, click App for Office from the left navigation Upload the Manifest file Add Office add-in to Word Open the SharePoint site. Click on document library where you want to create the Word file with add-in. Select the document template from the library and open the Word document in the Word desktop (client). On the Ribbon, click on Insert tab, and select Office Add-ins. A dialog box appears with various Office Add-ins available in the Office catalog. Click on My Organization, and select Office add-in AdAuthoring Smart Panel and click on Add button as shown in the below image: AdAuthoring Smart Panel will appear on the right side of the document. This panel is the normal SharePoint page and will work as a task pane. So, this is it! Have any questions or queries? Let me know in the comments below, and we can discuss on it.
Unlock the power of workforce data with HR dashboards and reports

We understand that consolidating data from multiple sources, tracking employee engagement, and bridging the gaps within team and management are some of the biggest challenges of an HR executive. With our custom HR dashboards and reports, you can have all your data pulled and presented in one place, visualized through charts, graphs, and other stunning visuals to spot specific trends and measure your company’s progress towards goals. Also, it helps you stay current by scheduling automatic data refresh. Click here to explore the live HR dashboard, and find out how the data filters automatically based on different parameters.
SharePoint Approval Workflows with metadata made easy
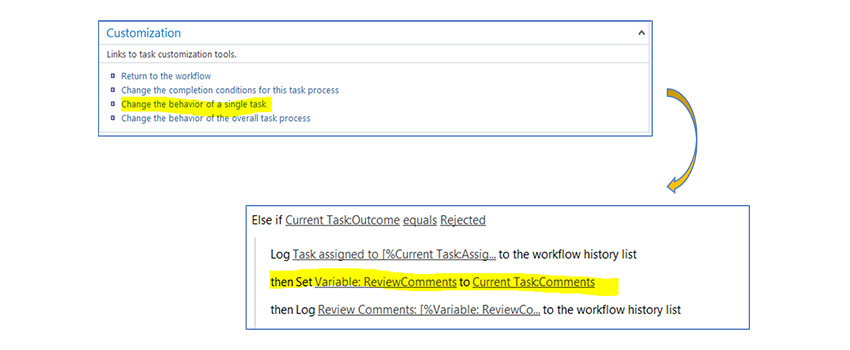
This post talks about the solution to a problem when SharePoint 2013 workflow doesn’t work for document approval workflows.
Dynamics 365 vs QuickBooks: 5 benefits for your business

In this blog post, I will talk about creating a content type in SharePoint site that anyone can use wherever and whenever needed. Site content type is a reusable collection of metadata (columns), workflow, behavior that helps provide consistency all over the site. These content types can be easily included in the lists and libraries. Let’s get started – Create a content type 1. Navigate to the site for which the site content type is to be created. 2. Click Settings and then click Site Settings. 3. Select Site content types under Web Designer Galleries. It will list all the existing content types, grouped on the basis of categories, like custom, community, Business, etc. 4. In the Show Group box, select the group and then choose Create 5. On the New Site Content page, provide a name and description for the new content type. 6. In the Parent Content Type section, select the name of the parent group and then choose the Parent Content Type. 7. In the Group section, check whether to keep the new content type in an existing group or to create a new group for the new content type. 8. Click OK. 9. After creating, content type page open up to add column to content type, select Add from existing Site column. 10. Select column from the groups to add and click on OK Bind a template with a site content type Custom document template such as Word, Excel, PowerPoint etc. can be integrated with content type, and below are the steps to it – Go to Site Settings, Site content typesfrom the galleries, and select the content type. Under Settings, click Advanced settings. Choose Enter the URL of an existing document template if it is already in the site and type the URL, or choose Upload a new document template, browse the file, select it, and then click Open Click Yes under Update all content types inheriting from this type? If all content types need to be updated that inherit from this content type, then click OK. This is how you can have custom content type created and ready to be used throughout.
Major concerns for Cloud Computing in respect of Office 365

As a Microsoft partner for Office 365 and Azure solution implementation, we often come across customers who are either planning to migrate some of the workload to Office 365 or started some proof of concepts for selective workloads in cloud, but worry of adopting cloud as primary workload or infrastructure. This situation is mostly prevalent in small and medium sized organization where IT must justify security, privacy and compliance concerns to business leaders and decision makers that their data is safe. Also, we have come across similar concerns for large organizations where they have matured into identifying general cloud concerns for a SaaS or PaaS based platform and how to evaluate for a specific vendor. We try to evade all these concerns and doubts because for most of the organizations this is paradigm shift for extending some part of their infrastructure on cloud. Some of the major questions asked are – Is our information secure? Who can access it? What are the data privacy policies? How do these policies translate on how we manage and store our data in the cloud? Let’s dive into the answers which are specific to Office 365. Data ownership and protection Most important question is related to data ownership and protection of data on office 365 – like who has access to my data, where my data is stored, who owns my data. Where my data is stored? Microsoft Office customers know where their customer data is stored and the location of their datacenters around the world. Each of our business cloud services has specific data residency and transfer policies. The customer’s country or geo, which the customer’s administrator input during the initial setup of the services, determines the primary storage location for that customer’s data. So, in case if a customer’s primary office is in India then datacenter will reside in India. You can check more information on geos and location here. This site lists all geos and location of data for all types of Microsoft online services. Who owns my data? If you put your money in a bank who owns your money? You. Bank is just managing money on your behalf. In same way, you own your data For Microsoft, your data is your business. Microsoft does not share business customer data with our advertiser-supported services, nor do we mine it for marketing or advertising. This policy is backed by our agreements and reaffirmed by the adoption by many Microsoft services of the world’s first international code of practice for cloud privacy, ISO/IEC 27018. What happens to my data if I leave the service? Based on Online Services Terms, Microsoft contractually commits to specific processes when a customer leaves a cloud service or the subscription expires. This includes deleting customer data from systems under Microsoft’s control: If you terminate a cloud subscription or it expires (except for free trials), Microsoft will store your customer data in a limited-function account for 90 days (the “retention period”) to give you time to extract the data or renew your subscription. During this period, Microsoft provides multiple notices, so you will be amply forewarned of the upcoming deletion of data. After this 90-day retention period, Microsoft will disable the account and delete the customer data, including any cached or backup copies. For in-scope services, that deletion will occur within 90 days after the end of the retention period. (In-scope services are defined in the Data Processing Terms section of our Online Services Terms.) How I would get my data if you go out of business or I terminate the contract? For Microsoft partners and reseller this is a common question – If a partner or reseller goes out of business, customer can change partner or reseller as their services are governed under contract with Microsoft. In case customer does not want to continue online services like Office 365 with Microsoft they have ample time to get backup or migrate their data to other services after subscription termination as described in above question. Who can access my data? During the term of your subscription to Microsoft business services, you can access and extract your customer data. Customers of Azure, Dynamics 365, Intune, and Office 365 in-scope services can retrieve a copy of their customer data at any time and for any reason without the need to notify Microsoft or ask for assistance. Microsoft limits access to customer data by deploying several measures and processes that falls under two categories – physical and logical Access to physical datacenter facilities is guarded by outer and inner perimeters with increasing security at each level, including perimeter fencing, security officers, locked server racks, multifactor access control, integrated alarm systems, and around-the-clock video surveillance by the operations center. Access to customer data is restricted based on business need by role-based access control, multifactor authentication, minimizing standing access to production data, and other controls. Access to customer data is also strictly logged, and both Microsoft and third parties perform regular audits (as well as sample audits) to attest that any access is appropriate. In addition, Microsoft uses encryption to safeguard customer data and help you maintain control over it. When data moves over a network—between user devices and Microsoft datacenters or within datacenters themselves—Microsoft products and services use industry-standard secure transport protocols. To help protect data at rest, Microsoft offers a range of built-in encryption capabilities. Microsoft engineers do not have default access to cloud customer data. Instead, they are granted access, under management oversight, only when necessary. What happens if you get a request from local, state or federal government to access my data? In the case of government surveillance, Microsoft has taken steps to ensure that there are no “back doors” and no direct or unfettered government access to your data. Microsoft impose carefully defined requirements for government and law enforcement requests for customer data. Microsoft will not disclose data hosted in Microsoft business services to a government agency unless required by law. If Microsoft is compelled by law to disclose
Enterprise-level innovation is democratized and available for SMB

Trends relating to cloud, mobility and data driven collaboration mean that SMBs can be every bit as sophisticated and cutting edge as large enterprises.
Spending too much time troubleshooting IT issues?

How many calls or requests in a week do you think the help desk receives related to infrastructure? How long do you think the help desk spend working on these issues? Apparently, more than you think. Managing day to day IT operations hold the IT team to focus on the core business. In other words, if you’re just solving the problems and not planning to prevent them, you will always have to keep solving them. Reasons could be relying on old technologies for running your operations and not because you do not want to upgrade. The business-critical system of your company cannot afford the downtime of transition to newer technologies. But on the other side, this causes slower performance, troubleshooting, and costs time and money. Also, there might be a situation that you are spending much on barely used systems. The IT team keep maintaining multiple legacy systems and doing this adds a layer of complexity to the infrastructure. But again, when the problem arises it become harder to spot a problem which again needs a lot of efforts. Chances are your company falls into at least one of these categories and is wasting at least some part of its IT budget. And all these problems come from the same place: You’re not getting enough return on your infrastructure investments. So, is it the right time for you to move your infrastructure to Cloud? Today users are becoming increasingly demanding: they want useful resources more quickly than ever, and they want to be able to access services whenever they want. It is not about the size of the company; it is all about the speed at which your business operates. A decision to move to the cloud gives organizations enormous advantages Lower cost It saves a lot of up-front costs related to hardware and human resources. You simply pay for what services you use. So, less budget for IT infrastructure and more focus on actual business problems. Faster and up-to-date setup It can typically be deployed in a matter of days as there is no need to install software or hardware on-site. Also, you do not have to worry about the system maintenance and upgrades. On demand availability It gives you the agility to scale up and down with growing or fluctuating demands. Also, it offers flexibility for employees to access the company resources and work from almost anywhere. So, considering these points, and the benefits that the cloud can provide to your organization, I think this is the right time for you to move to the cloud. We are Value Added Reseller (VAR) of major cloud services providers, we bring together consulting, migration, operations and licensing services enabling you to adopt cloud technologies in the most fruitful manner seamlessly. Call us today at +1-425-256-3123 or Email us at connect@advaiya.com to discuss your challenges and see how we can help.