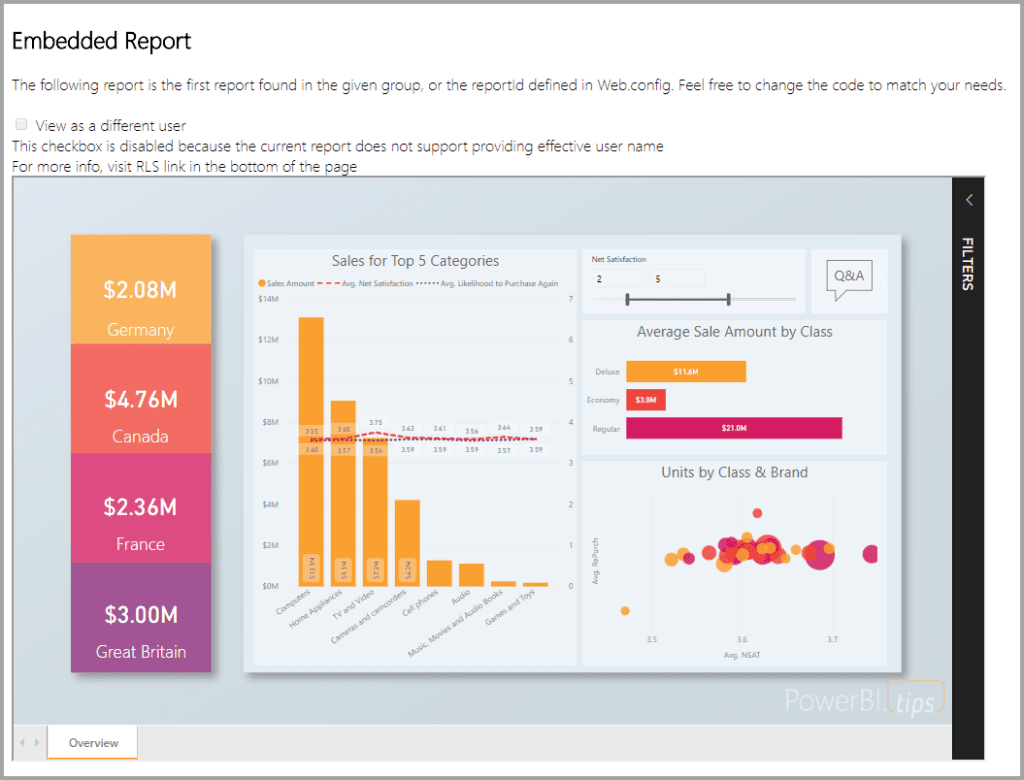
Power BI Embedded in Azure provides us with the ability to embed reports, dashboards or tiles into an application by using app owns data. App owns data typically means having an application that uses Power BI as its embedded analytics platform. As an ISV developer, you can create Power BI reports in an application that is fully interactive, and the end users of the application will not require a Power BI license to view the report content.
Why do you need analytic solution embedded into your app?
- Embedding Power BI helps ISVs or developers to embed visuals into customer applications and assist them in making better decisions without building an analytical solution.
- Embedding analytics helps business users to access their business data and perform required actions to generate valuable insights using this data within the application.
- Minimize development efforts and achieve faster time to market with your application.
- Spend more time focusing on your product rather than developing visual analytics features from scratch.
- Deliver value for your customers by easily exploring data and gaining insights from anywhere.
In this blog, I will explain how you can integrate a Power BI report into an application using Power BI .NET SDK. Here you are using Power BI Embedded in Azure for your customer using app owns data.
Prerequisites
- A Power BI Pro account, sign up for a free trial
- A Microsoft Azure subscription, create a free account
- Set up your own Azure Active Directory tenant setup.
- Visual Studio (version 2013 or later).
Part 1 – Registering your application in Azure Active Directory (Azure AD)
- To establish an identity for your application and to specify permissions to Power BI REST resources you need to register your application in Azure AD.
- To register your application, your Azure AD should also have the rights to give permissions.
- Go to Azure Portal and then go to Azure AD.
- Go to App Registrations and click on New application registrations.
- Follow the prompts and create a new application. After filling this up, it should look like this.

You need to enable additional permissions for your application.
- Click on Settings of the application you just created and click on Required Permissions

- Click on Windows Azure Active Directory and click on all the Delegated Permissions and click on Save.
- Now click on Add and add Power BI Service API

- Select all permissions under Delegated Permissions and Select Save when done. Remember you can only grant the permissions if your account has Global Admin rights.

Part 2 – Setting up Power BI Service Environment
- To embed reports for your customers, you need to place your reports into an app workspace. The master account must have admin rights for the workspace.
- Create an app workspace by selecting workspaces > Create app workspace. This is where you are going to publish your Power BI report.
- Open your Power BI file in Power BI desktop and publish the report to the workspace you have created. Now, you can view the report in Power BI service.
Part 3 – Embedding the report into your application
- For demo purpose, download the App Owns Data sample application code provided by Microsoft.
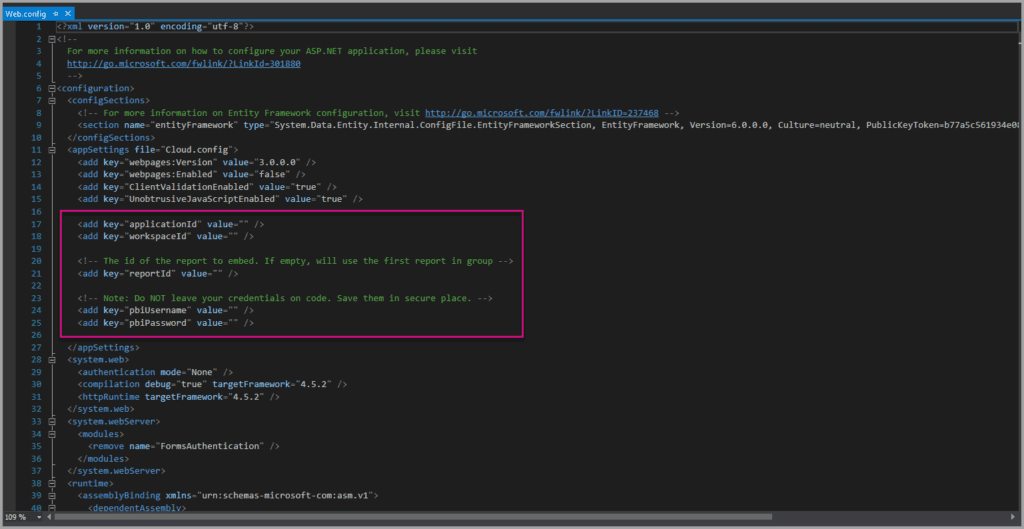
- To embed the Power BI report into your application, you need to fill five fields in order to run the application successfully. These are application ID, group ID, report ID, power BI username and password.
- Open the Web.config file in the sample application; this is where you must fill all these IDs.
- Fill in the application ID field with the application we created from Azure. The application ID is used by the application to identify itself to the users from whom you're requesting permissions.
- In the Azure portal, select All Services and select App Registrations and click on the application you have created in Part 1. We need to take Application ID from here.

- Now, open your Power BI report in Power BI service. From this URL you will get workspace ID and report ID.
- From this URL, workspace ID will be 1a8d021d-9bfd-47a0-966f-c2d181449b26.
![]()
- From this URL the report ID will be 8ecc94fa-fe19-41f5-968e-725989ede165.
![]()
- The first ID written after groups is the Workspace ID while the second ID written after reports is the Report ID.
- So, now we have all the three IDs required. Put them in the Web.config file along with the username and password of the Power BI master account.

- Then, Run the application and you can view the report in the sample application.
Part 4 – Move to production
After you’ve completed developing your application, you have to back up your app workspace with a dedicated capacity. This dedicated capacity is required to move to production.
A dedicated capacity will give you an advantage of having a dedicated resource for your customer. You can purchase a dedicated capacity at Azure portal.
Use the table to determine which Power BI Embedded capacity is suitable for your need.

- Sign into the Azure portal and select Create a resource> Data + analytics.
- Search for Power BI Embedded and within Power BI Embedded, select Create.
- Fill in the required information and then select Create.

- Assign your app workspace to dedicated capacity.
- Finally, after you have created a dedicated capacity, assign your app workspace to that dedicated capacity.
- In the Power BI service, expand workspaces and click on the ellipsis for the workspace you're using for embedding your content and then click on Edit workspaces.

- Click on Advanced and enable Dedicated capacity, then select the dedicated capacity you have created and click on Save.
These are the steps to embed a Power BI report into your customer’s application. We have started by registering our application in Azure AD, then we have setup our Power BI environment. Then we have embedded our report into the application by updating our application’s code. Finally, to move to production, we have created a dedicated capacity to backup our app workspace and our Power BI report is embedded into our application.

Get in touch with us to meet your specific information needs and make better decisions with Power BI solutions.


