This blog is third in the series “Visual Studio Online features (VSO)”. In the second part I had talked about Scrum process template based upon Scrum methodology, how you can create a new team project using the Scrum Template, and how to use it for day-to-day operations. You can read the second part – ALM with Visual Studio Online – Part 2: Using Scrum Process Template
Since its inception, Visual Studio has been a developer’s tools. With the ALM features becoming an integral part of Visual Studio 2013 and Visual Studio Online, you can now plan your project using Visual Studio.
With ALM, Visual Studio has matured from a developer-only tool to a central tool that is usable by all stakeholders of the project team. Visual Studio uses the Kanban methodology to track work items and report status.

Setting up the Project
When you create a team project, you need to setup a basic set of parameters to allow Visual Studio to filter work items appropriately for tracking and reporting.
Setup the Areas and Iterations
Areas and Iterations define different phases of your project. The scheme is flexible to use and do not set a guideline. One way to set them up is to define major version releases as Areas and sprints as Iterations. You can choose your own scheme that you are comfortable with.
Define start and end dates
Each Iteration will require at least a start date. However, it is recommended to define both Start Date and End Date. This helps in determining the pending items that need to be reviewed at the end of an iteration and probably move them to backlog for re-scheduling.
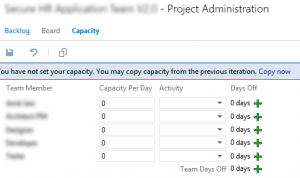
Determine team availability
For each iteration, you can specify the team availability and days off. Using this Visual Studio calculates the work load for each team member in terms of hours and uses it to track project progress and slippages.

Visual Studio Project Administration – Capacity Planning
Setup task tracking
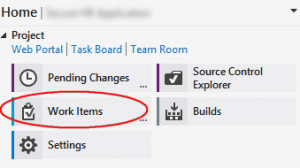
- Fire up Visual Studio 2013 and connect to TFS. Once the Team Explorer loads up, click on the “Work Items” tab.

Setup task tracking in Visual Studio
- In the Work Item tab, click on “New Work Item”. This brings up a menu showing the types of work items you can create under the selected project. Bear in mind that the types of work items you can create are based on the project template you have selected while creating the Team Project. The one shown in the image below are the work item types for the Scrum template.

Work items view in Visual Studio
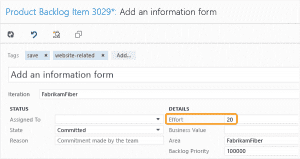
- Pick a work item from the menu that suits your purpose. Visual Studio opens up a dialog editor with fields related to the work item type you have just chosen. To see the hierarchy of work items, read my earlier blog post on Scrum Template. Mention the effort required to complete the work.
 Product backlog item in Visual Studio
 - Once you define a Product Backlog item, start defining the tasks that you will need to perform in order to complete the Product Backlog item.
- After you have defined the Product Backlog and Tasks, go to the Task Board. The task board is based on the Kanban methodology. Here you can drag and drop tasks into one of the three buckets – To Do, In Progress, and Done.
As the project progresses, keep marking the status of the tasks as In Progress / Done. Visual Studio will begin providing beautiful reports on your project progress.
Planning and tracking with Microsoft Project and TFS
If you are comfortable using Microsoft Project Professional, then plan your tasks in Microsoft Project and synchronize them with Visual Studio Online or TFS. Then track the progress in Microsoft Project and synchronize it periodically with VSO or TFS.
Both approaches provide the same results. Pick whichever you are comfortable with.
Let me know in the comments how you use VSO / TFS to plan and track your project tasks. Do you do it differently? What approach other than the one I mentioned do you adopt in VSO to help you with day-to-day project management?
Related links:
Application Lifecycle Management with Visual Studio Online – Part I.
ALM with Visual Studio Online – Part 2: Using Scrum Process Template.


