Office add-in deployment with Com add-in is a tedious task. The Com add-in package has a .msi file or an executable file that requires software deployment interface, and requires pushing the add-in down to every computer using System Center Manager. It gets drearier when there are updates in the add-in, and those are to be pushed on every computer again.
To overcome this, a new Office add-in programming model is available for extending Office applications using the JavaScript APIs. Add-in can be quickly built and can be associated with the task pane with the Office products like Word excel, or PowerPoint. In this post, I will explain how to create Word add-in in the SharePoint.
These are the basic steps:
- Create the SharePoint page in pages/site pages’ library. This page will interact with the Word add-in
- Create the manifest file and add the SharePoint URL in the manifest file
- Add the manifest file in Office app catalog/network drive
- Add add-in to the document present in the document library
To overcome this, a new Office add-in programming model is available for extending Office applications using the JavaScript APIs. Add-in can be quickly built and can be associated with the task pane with the Office products like Word excel, or PowerPoint. In this post, I will explain how to create Word add-in in the SharePoint.
Create SharePoint page
Create a SharePoint page in pages/site pages’ library with the name AdWordAddin.aspx. This page has the required office.js, custom js, which will fetch the data from SharePoint list and libraries. This page will open in the custom task pane that is associated with the Word add-in. When the SharePoint page opens in the task pane, it will work in the same context as SharePoint.
Create Manifest file
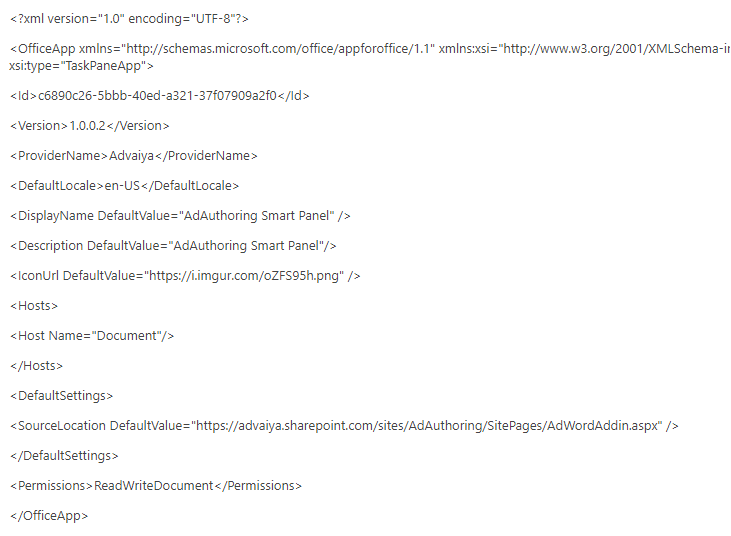
- Create the manifest file with the below XML. Replace the default URL with the SharePoint page URL created earlier.

- Save the file as AdAuthoring Smart Panel.xml
Deploy the Manifest file on Office App catalog
- Click on O365 icon and select Admin
- Navigate to the Admin Center->SharePoint. On the left navigation, click on the App and select App Catalog. Using this, create the new app catalog site collection on SharePoint

- Once the app catalog site is created, click App for Office from the left navigation
- Upload the Manifest file

Add Office add-in to Word
- Open the SharePoint site. Click on document library where you want to create the Word file with add-in.
- Select the document template from the library and open the Word document in the Word desktop (client).
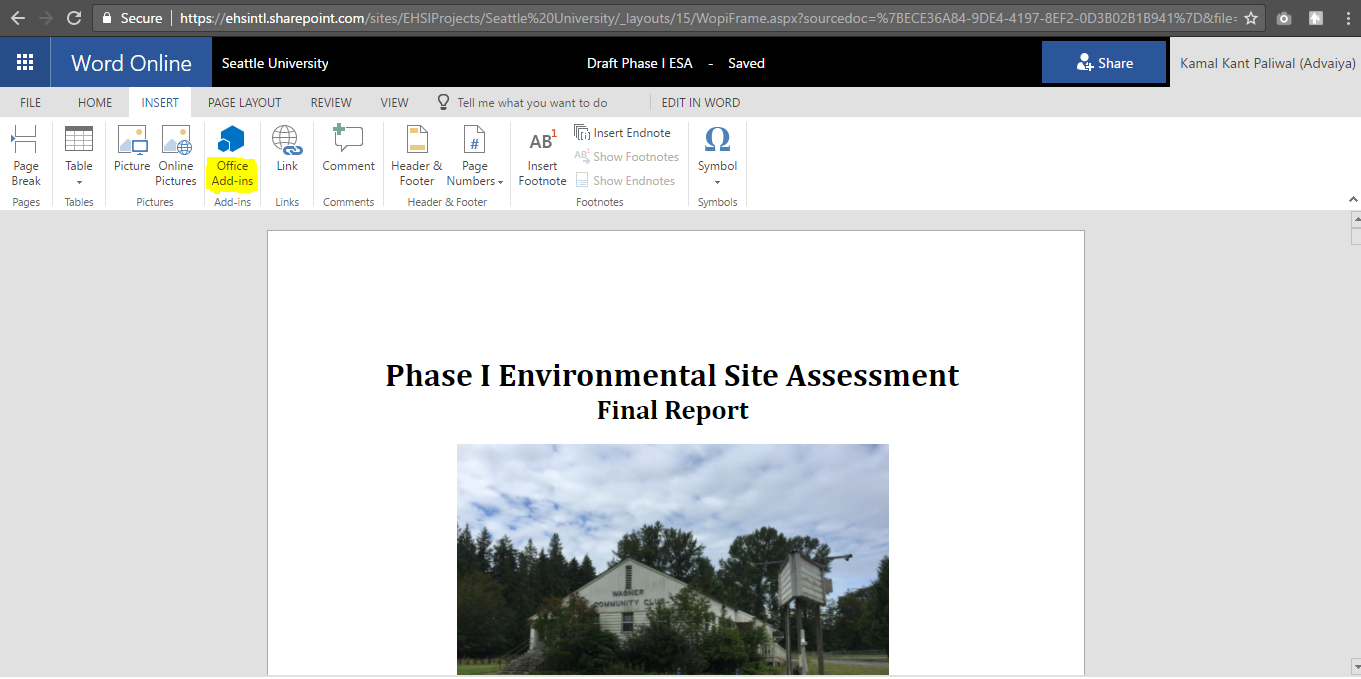
- On the Ribbon, click on Insert tab, and select Office Add-ins.

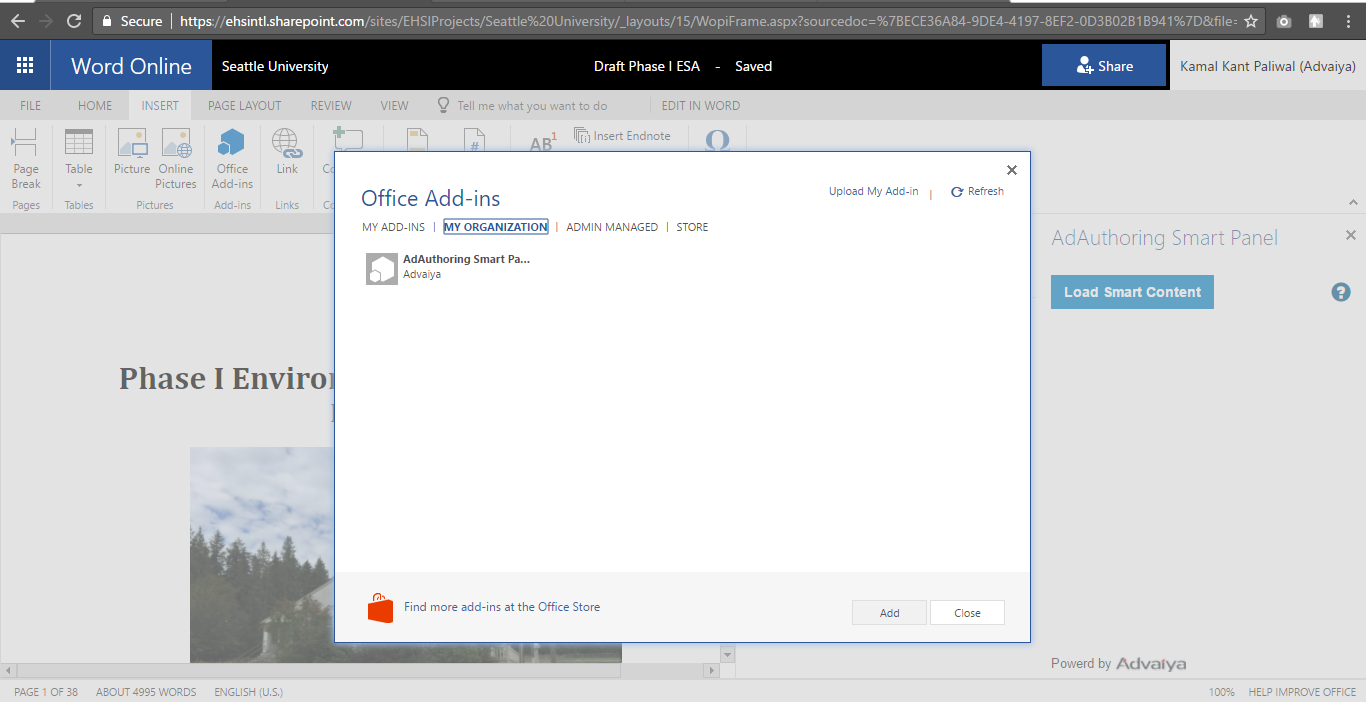
- A dialog box appears with various Office Add-ins available in the Office catalog. Click on My Organization, and select Office add-in AdAuthoring Smart Panel and click on Add button as shown in the below image:

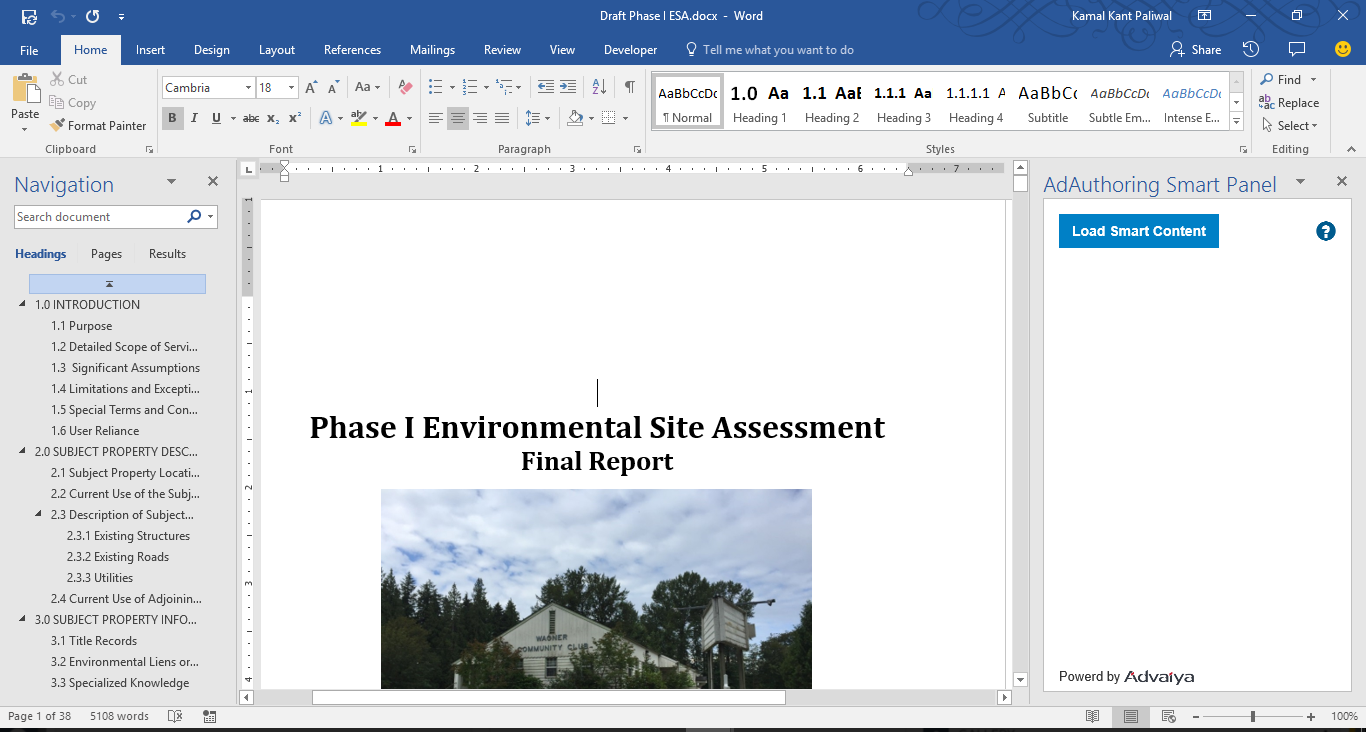
- AdAuthoring Smart Panel will appear on the right side of the document. This panel is the normal SharePoint page and will work as a task pane.

So, this is it! Have any questions or queries? Let me know in the comments below, and we can discuss on it.


