While working with Office 365 custom applications sometimes, certain non-browser applications do not support multifactor authentication. Eg: In Project Online/SharePoint Online for various custom operations we make use of ODATA, RESTand CSOM operations. To carry out these operations we require a service account, and it should have Azure AD multifactor authentication disabled. However, nowadays due to security concerns, organizations prefer to use service accounts also with multifactor authentication enabled which the custom applications do not support. I will be sharing here how we can handle and perform the custom project online operations with an account with multifactor authentication enabled.
We can carry out the operations with multifactor authentication-enabled accounts in 2 ways:
- App Password
- Azure AD App authentication.
Let’s discuss both the above methods:
App Password:
Using app passwords, the applications work correctly by bypassing multi-factor authentication and thus replacing the user's regular credentials. Sign-in using app-password does not give any additional verification prompt and authentication is successful.
These passwords are automatically generated which makes them secure.
To create an app password admin needs to enable the app password feature. To generate the app password below steps can be followed:
- Sign in to Azure Portal(portal.azure.com)
- Go to Azure Active Directory
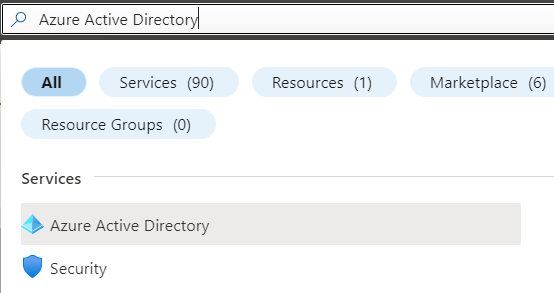
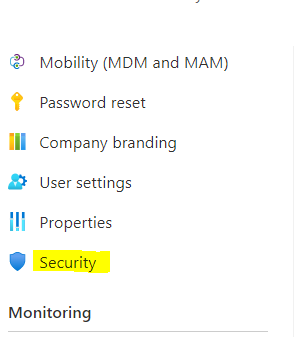
- Select Security under Manage.
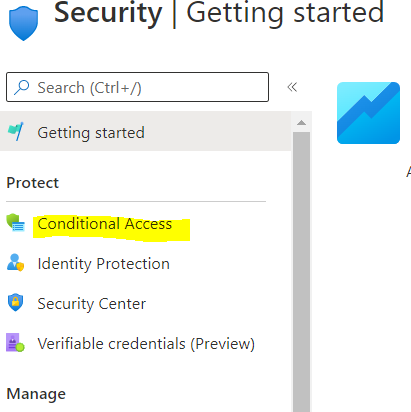
- Select the Conditional Access option from the left.
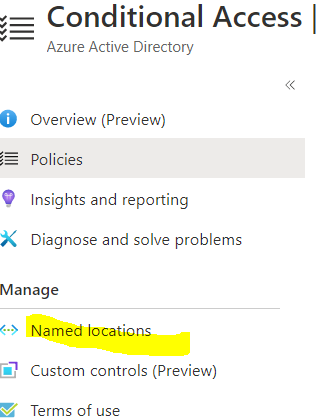
- Select the Named location from the left.
- Click on Configure Multifactor authentication trusted IPs

- On the multi-factor authentication page, select Allow users to create app passwords to sign into non-browser apps
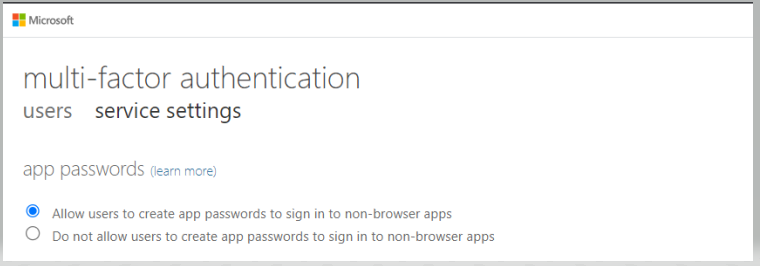
Now, let’s see how we can generate an app password.
- Log in using your office 365 account and go to the My account page and select Security info.
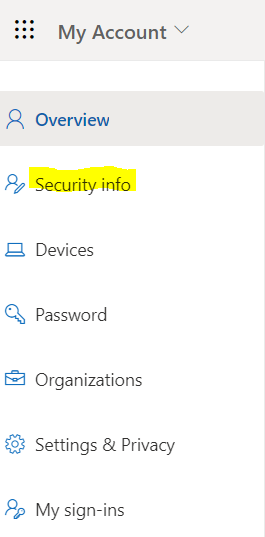
- Under the Security Info page click on Add sign-in method.

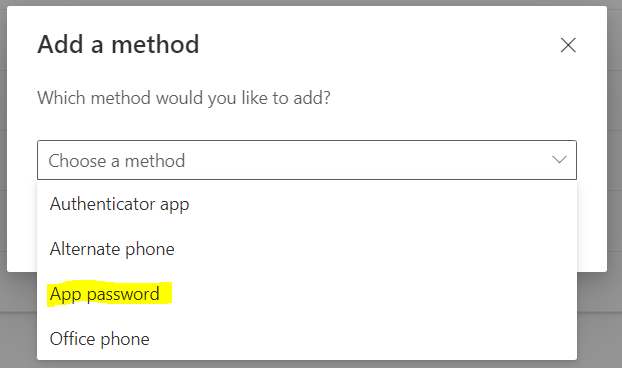
- Choose the App password and add it.
- It will ask to enter a name for the app password.
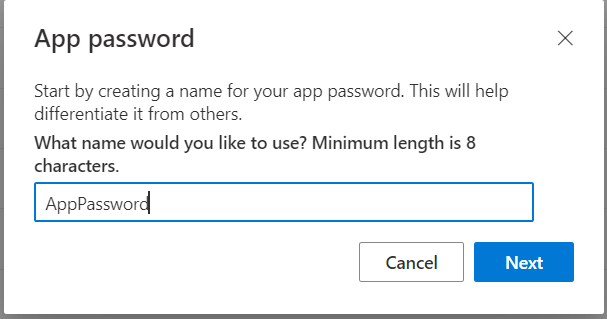
- Copy the password for future use as it will not be shown again and then you will have to generate a new one. Click on done.
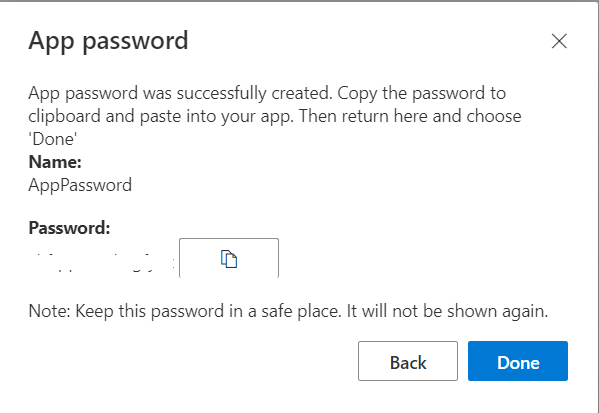
You are now ready to use this app password in your applications. You can use this in any Office365 operations using CSOM, Odatawith MFA enabled account.
- You can delete the app password from the list under the security Info page or can create a new one.
Creating the Azure AD App for Multifactor Authentication
Here, I will be showing the configuration to perform Project Online operations using a multifactor authentication-enabled account using Azure AD App. This option will be helpful in case the app password also does not work due to security configuration.
- Using an Office 365 account log in to https://portal.azure.com.
- From the home page select Azure Active Directory.
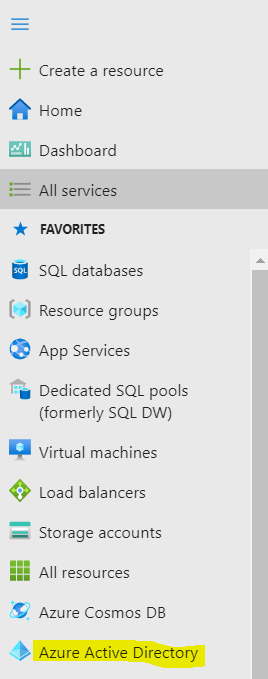
- If you already have an Azure Active Directory App you can use the same to set the required permission else can create a new one. Click on All applications to select the existing app.

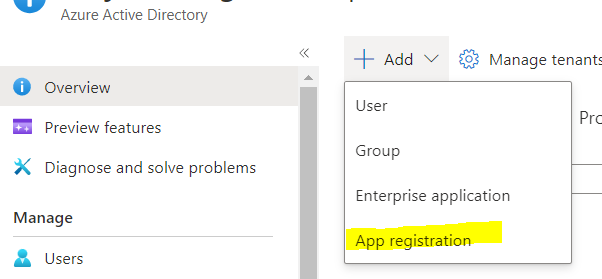
- To create a new app, Click on Add and select App registration.
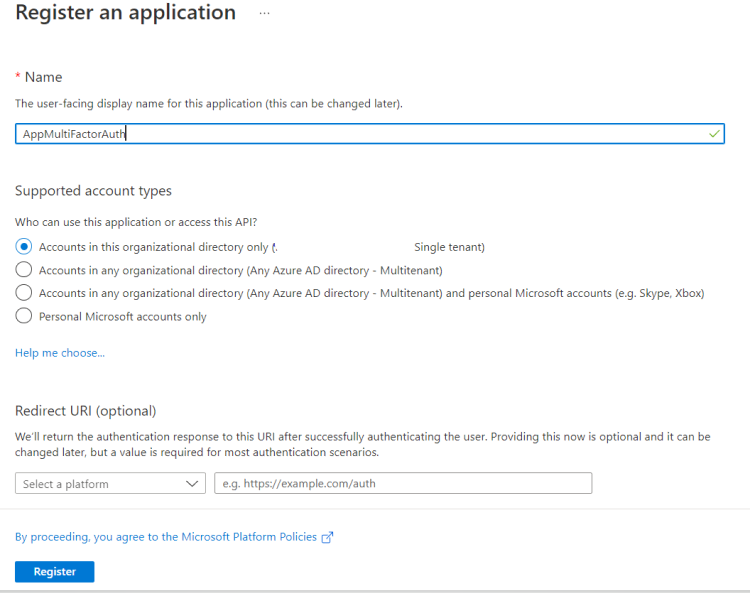
- Below screen will display. Give a name to the app and register. Keep the default setting for permission. The app will get created.
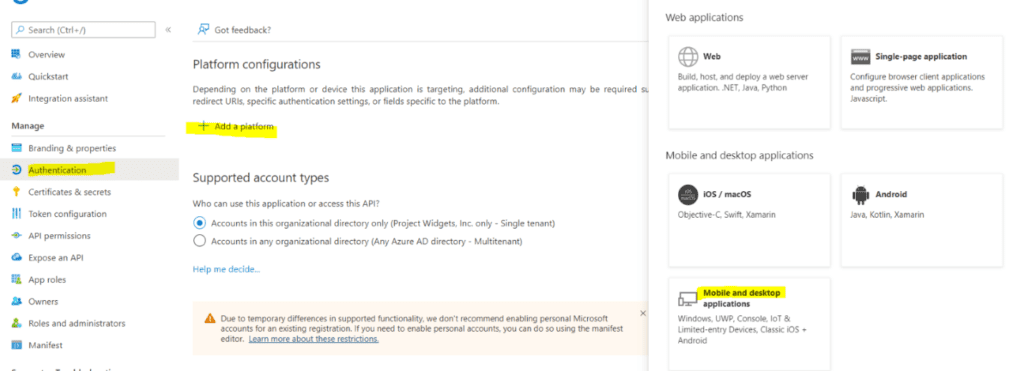
- Open the app and click on Authentication->Add a Platform and select Mobile and desktop application.
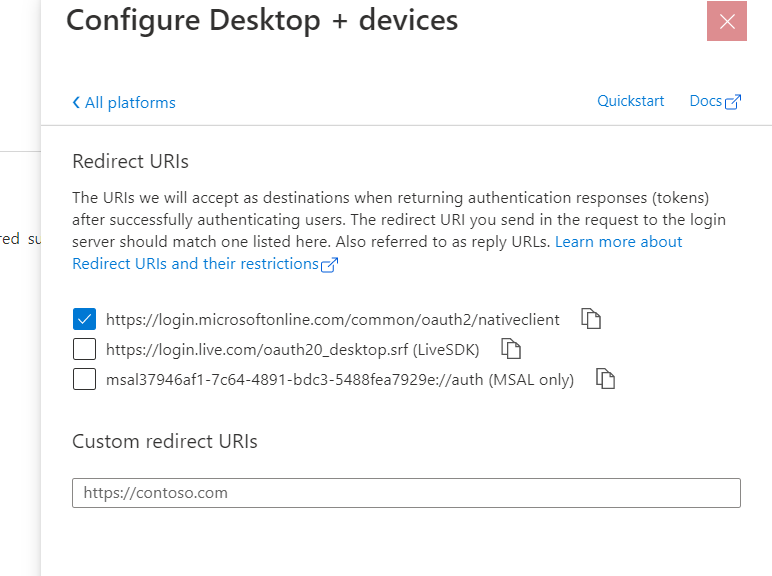
- Configure the redirect URL by selecting
https://login.microsoftonline.com/common/oauth2/nativeclient
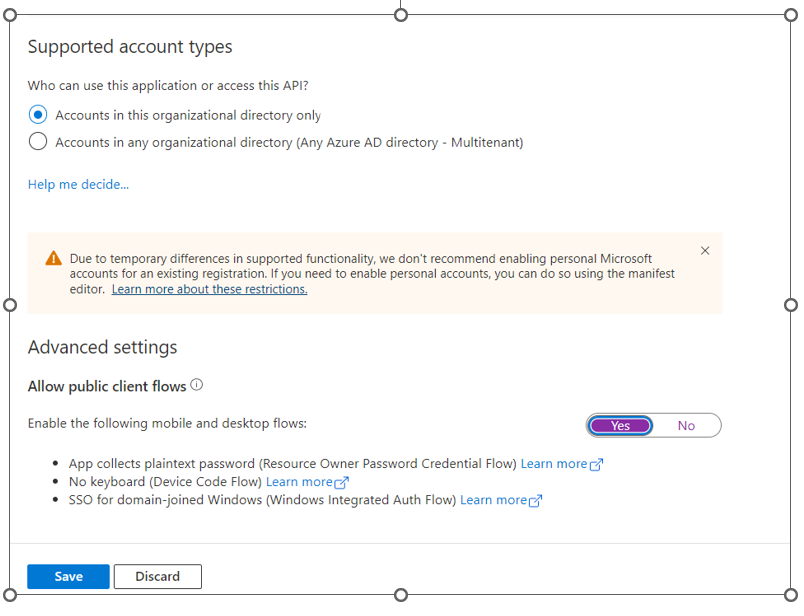
- Enable Allow public client flows by selecting Yes and Save
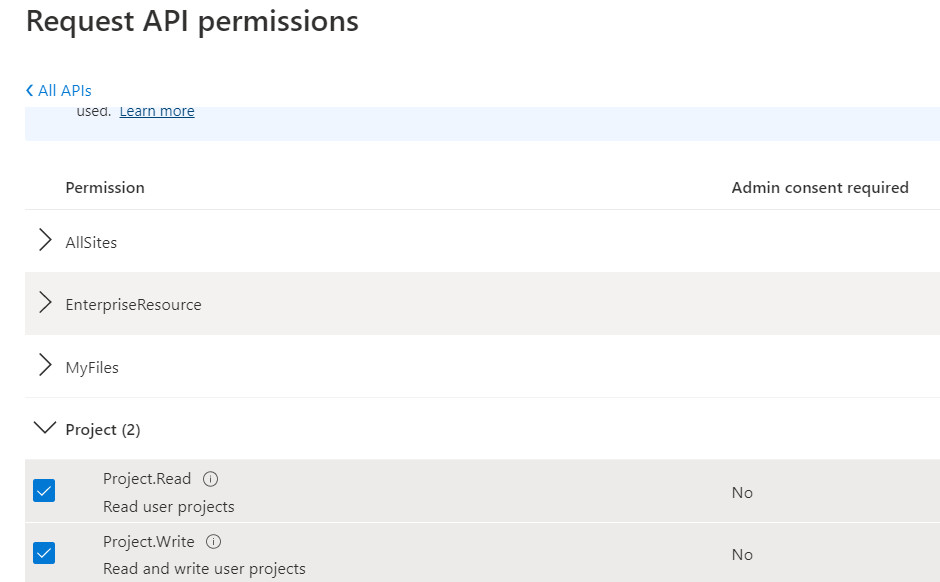
- Select API permission from the left section. Then click on Add permission. A list to select the API will appear. Under Microsoft API select SharePoint to set the permission for Project operations. In a similar way whichever API we want to fetch data, we can grant permissions for that.

- Under this permission selects Delegated permission.
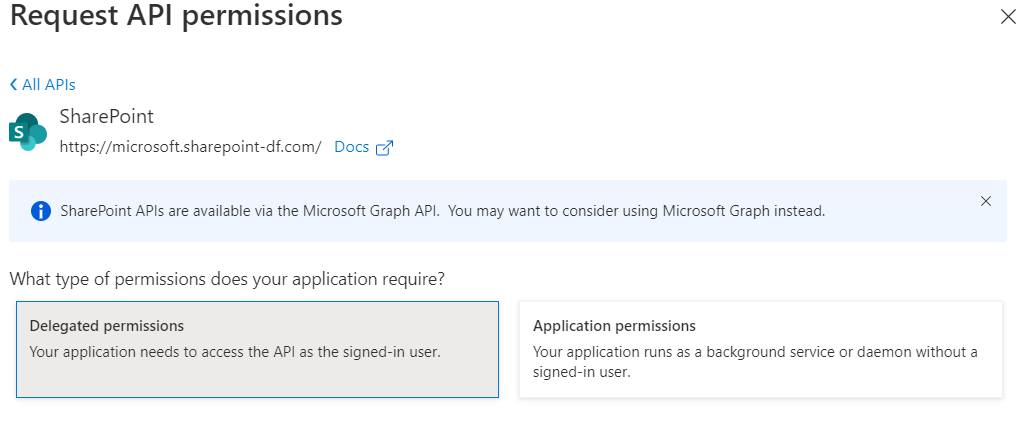
- Under Project Select Read and Project. Write permissions and add. If you only want read access, then can select only read permission.
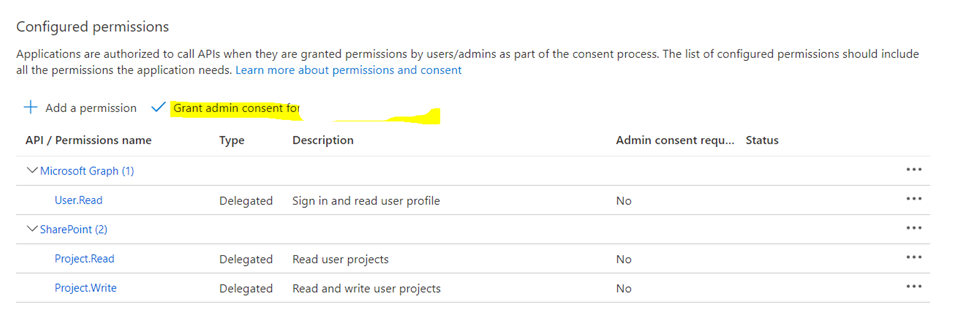
- Permissions get added and now click on Grant Admin Consent to give the admin consent.
- Click on Overview and copy the Application ID i.e., the client Id that will be used in the application.

The configuration is complete. Let’s see how to use it in non-browser applications.
Here you can create a console application and put the below code. The things that you need to consider are:
- Add a reference to the latest MSAL (Microsoft.Identity.Client ) and Microsoft.ProjectServer.Client from Microsoft.SharePoint Online.CSOM.
- Need to define the scope which is the permission URL like"<SharePoint URL>/Project. Read. Here we will only get the list of projects so have used the read URL and we can use it as per the operations.
- The redirect URL is fixed and is the one which we have added under the AD app above.
- Use the Tenanat ID and client ID of the AD app.
- When we use the user credentials then we use SharePointOnlineCredentialsclass to set the credentials. Here, in this case, we will pass the token in the request header using the Authorization header as authentication will be done using the Azure AD app.
Here, one thing that happens is, it will ask for a pop-up to enter the credentials if it is not cached.
In a similar way, you can perform any Project Online/Office365 OData call also. All other calls can be carried out after adding the appropriate permissions in the AD app.
Happy Coding!

Supriya Khamesra
Supriya is currently working as a Senior Consultant – Business Applications with Advaiya and has more than 10 years of experience in application development.
Microsoft Certified Professional in EPM, Supriya has extensive knowledge in technologies including – SharePoint, Enterprise Project Server, SSRS, Azure, and client-side scripting among others.


