Workflows in SharePoint provide excellent ways to save effort, time, and cost by automating existing business functions. Here I am sharing the process of creating custom task outcomes in Project Server workflow.
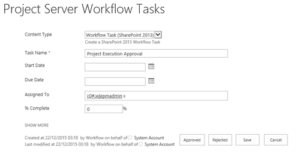
SharePoint 2013 out of the box has two task outcomes – Approved and Rejected as shown below:
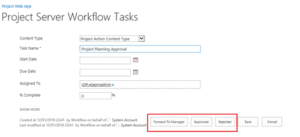
Let’s consider a use case – While creating a workflow in Project Server 2013, there is a requirement that if a project manager creates a project and submits it, it should go to the PMO for approval, and the PMO should get three options for approval- Forward to Manager, Approved, and Rejected as shown below:
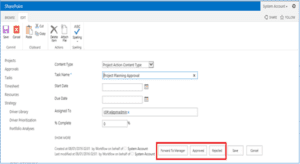
Below are the steps to address this requirement through the custom task outcome functionality.
a) Create a new task outcome column-
-
- Go to PWA Site Settings – > Site columns
-
- Click Create
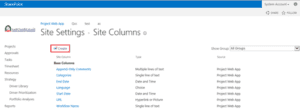
- Enter column name as Project Action Outcome and in the additional column settings add all the desired task outcomes. Click on OK.
b) Create a new content type
-
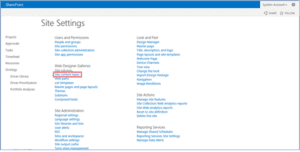
- Go to PWA Site Settings -> Site Content Type
-
- Click Create

-
- Create a custom content type as Project Action Content Type with below selections:
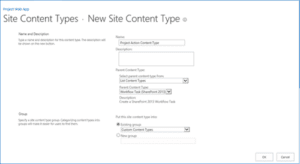
- Click OK.
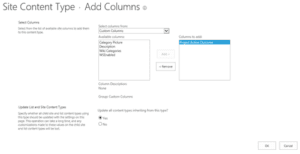
- On the content types settings page, click Add from existing site column.
- Add Project Action Outcome column to it.
c) Add a newly created content type to the workflow task list.
-
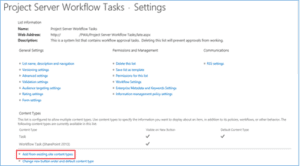
- Open Project Server Workflow Task List
- Go to List Settings -> Add Existing Content Type
-
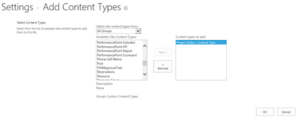
- Add Project Action Content Type
d) Update the wokflow-
-
- Open/create Project Server workflow in SharePoint Designer 2013
-
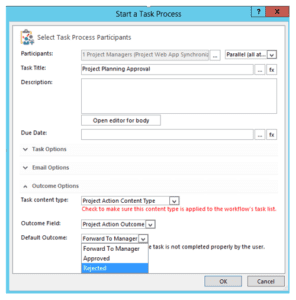
- Open the assign task property
-
- Expand the Outcome options
-
- Select the task content type as Project Action Content Type
-
- The output will look like below:
-
- Click Save and publish the workflow.
-
- Now when you run the workflow and edit the task, you will see a newly created task outcome.
I have implemented this approach for Project Server workflow; the same approach can be used for any SharePoint workflow.
