Facebook is the world’s most popular and growing social network for both businesses and individuals. Facebook business pages can be of a great help to achieve your business goal. These business pages allow you to promote your products and services, offer discounts, showcase videos, etc. You can build a closer relationship with your audience, reach and engage the people who matter the most to your business, and turn the likes and comments into leads.
There is more to Facebook business pages than the standard tabs that come out of the box – Photos, FB wall, Info, etc. You can add custom tabs to your Facebook Business page in order to organize your information in a more systematic way, and attract more visitors and retain them. Being able to create custom tabs on Facebook can be a huge plus. You can use these custom tabs to:
- Organize your content like you do on your website.
- Promote the links of specific tabs rather than complete page.
- Use several apps, as required and suitable, for promoting your business.
There are several third party apps available, which allow you to display the static HTML within the iframe they provide. For example – woobox, StaticHTML, etc. However, adding dynamic content to a Facebook custom tab, that blends dynamic HTML into it (social streams, slider and effective user experience controls), requires a bit of programming skills.
Note: We assume that you have html pages deployed on your Microsoft Azure website or any other live website which we will use to blend with the custom tab being created in the steps below. In my case, I am using the following published URL –https://fbcanvassite.azurewebsites.net
So here we go!
- First of all you need a Facebook developer account to login to Facebook developer site.
- Navigate to https://developers.facebook.com/apps
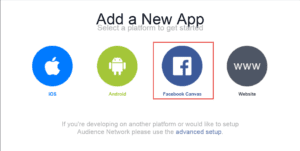
- Click Add a New App button given on the right side.

- Select Facebook Canvas.

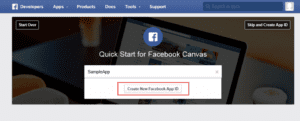
- Type the name of your app as done in the image below. In my case its – InformationApp.

- Click Create New Facebook App ID

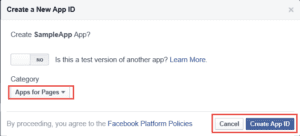
- On the next screen, under Category, select Apps for Pages and click Create App ID.

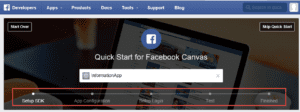
- After clicking Create App ID, the app page will load showing the details of the steps to be performed for creating the app.

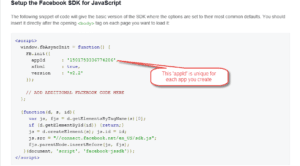
- The Setup the Facebook SDK for JavaScript section of this page, gives the JS Code to be added to your page, this code includes the unique ID of the app you created.

- Embed this code in your page which you want to blend with the custom tab that you are creating.
- Now, publish the project to the Azure Website (if you have an existing website created on your azure account). In case you do not have, you can create a new Azure Website using Manage Azure).
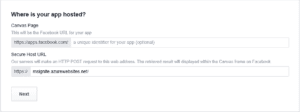
- Under Where is your app hosted? section, there is field labeled Secure Host URL. Enter the URL (prefixed with https) of the Azure website where you have deployed your page. I am using one of my pre-created website which I had added to the Microsoft Ignite Facebook page. It is https://msignite.azurewebsites.net/.

- Click Next and then Next again.
- Click “Open Your App in Facebook“. This opens your App in your Facebook account.

- Go to https://developers.facebook.com/apps, and in the top menu, click Apps –> Select InformationApp (YOUR APP NAME) to update some settings on the app.
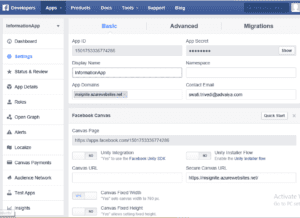
- Click Settings in the left navigation pane. Following information will be displayed:

- Add following information under Basic tab.
- App Domains: msignite.azurewebsites.net (Replace with – your website domain where your page is hosted)
- Contact Email: Your email address (in my case – swati.trivedi@advaiya.com). This should be the email Id using which your Facebook account created.
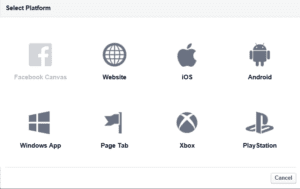
- Scroll down, and click Add Platform.

- Under Select Platform, select Page Tab.

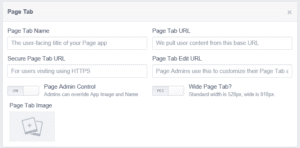
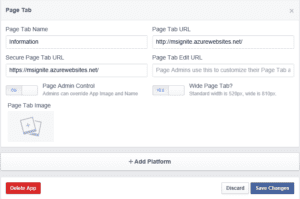
- This will add the section as shown below:

- Fill this section with the information as follows:
- Page Tab Name: Information (Replace with the name that you want to give)
- Page Tab URL: http://msignite.azurewebsites.net/ . (Replace with your page)
- Secure Page Tab URL: https://msignite.azurewebsites.net/ . (Replace with your page)

- Click ‘Save Changes’.
- Next step is to add this tab to your page (assuming you already have created the Facebook business page).
- Navigate to following link: https://www.facebook.com/dialog/pagetab?app_id=[YOUR_APP_ID]&display=popup&next=[YOUR_WEBSITE_URL]
- Here replace [YOUR_APP_ID] by the app id you got when you created the app. For example mine is 1500569086875916 and [YOUR_WEBSITE_URL] by the url of your website which you will blend in to the page. In my case, it is: http://msignite.azurewebsites.net/
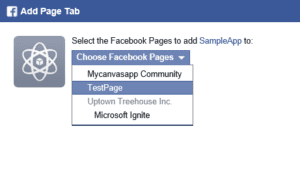
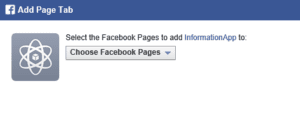
- On the Add Page Tab, page select the page where you want to add this tab.
 All the pages on which you have Admin rights, will be listed here in the drop down.
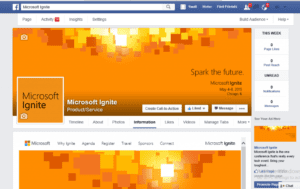
- In my case, I selected Microsoft Ignite and clicked on Add Page Tab button on the bottom-right corner. This completes the process to add the custom tab, now go to your facebook page, you will see the new tab with all default tabs. If you don’t see all tabs on the page then click on the ‘More‘ drop down which will show all tabs including your custom tab.

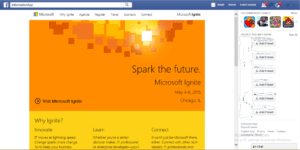
Here is the newly created information tab available on your Facebook page. You can see that your customized tab is now added to the default tabs of your page and it has been blended with the site which you had published on Microsoft Azure. (In my case – http://msignite.azurewebsites.net.
If you want, you can adjust the order of these tabs by click on More -> Manage tabs.
Would like to hear from you about how do you use Facebook custom tabs for your business? If you plan to use custom tabs after reading this article, let me know how helpful this article was?


 All the pages on which you have Admin rights, will be listed here in the drop down.