Office365 Operations with Azure AD Multifactor Authentication

While working with Office 365 custom applications sometimes, certain non-browser applications do not support multifactor authentication. Eg: In Project Online/SharePoint Online for various custom operations we make use of ODATA, RESTand CSOM operations. To carry out these operations we require a service account, and it should have Azure AD multifactor authentication disabled. However, nowadays due to security concerns, organizations prefer to use service accounts also with multifactor authentication enabled which the custom applications do not support. I will be sharing here how we can handle and perform the custom project online operations with an account with multifactor authentication enabled. We can carry out the operations with multifactor authentication-enabled accounts in 2 ways: App Password Azure AD App authentication. Let’s discuss both the above methods: App Password: Using app passwords, the applications work correctly by bypassing multi-factor authentication and thus replacing the user’s regular credentials. Sign-in using app-password does not give any additional verification prompt and authentication is successful. These passwords are automatically generated which makes them secure. To create an app password admin needs to enable the app password feature. To generate the app password below steps can be followed: Sign in to Azure Portal(portal.azure.com) Go to Azure Active Directory Select Security under Manage. Select the Conditional Access option from the left. Select the Named location from the left. Click on Configure Multifactor authentication trusted IPs On the multi-factor authentication page, select Allow users to create app passwords to sign into non-browser apps Now, let’s see how we can generate an app password. Log in using your office 365 account and go to the My account page and select Security info. Under the Security Info page click on Add sign-in method. Choose the App password and add it. It will ask to enter a name for the app password. Copy the password for future use as it will not be shown again and then you will have to generate a new one. Click on done. You are now ready to use this app password in your applications. You can use this in any Office365 operations using CSOM, Odatawith MFA enabled account. You can delete the app password from the list under the security Info page or can create a new one. Creating the Azure AD App for Multifactor Authentication Here, I will be showing the configuration to perform Project Online operations using a multifactor authentication-enabled account using Azure AD App. This option will be helpful in case the app password also does not work due to security configuration. Using an Office 365 account log in to https://portal.azure.com. From the home page select Azure Active Directory. If you already have an Azure Active Directory App you can use the same to set the required permission else can create a new one. Click on All applications to select the existing app. To create a new app, Click on Add and select App registration. Below screen will display. Give a name to the app and register. Keep the default setting for permission. The app will get created. Open the app and click on Authentication->Add a Platform and select Mobile and desktop application. Configure the redirect URL by selecting https://login.microsoftonline.com/common/oauth2/nativeclient Enable Allow public client flows by selecting Yes and Save Select API permission from the left section. Then click on Add permission. A list to select the API will appear. Under Microsoft API select SharePoint to set the permission for Project operations. In a similar way whichever API we want to fetch data, we can grant permissions for that. Under this permission selects Delegated permission. Under Project Select Read and Project. Write permissions and add. If you only want read access, then can select only read permission. Permissions get added and now click on Grant Admin Consent to give the admin consent. Click on Overview and copy the Application ID i.e., the client Id that will be used in the application. The configuration is complete. Let’s see how to use it in non-browser applications. Here you can create a console application and put the below code. The things that you need to consider are: Add a reference to the latest MSAL (Microsoft.Identity.Client ) and Microsoft.ProjectServer.Client from Microsoft.SharePoint Online.CSOM. Need to define the scope which is the permission URL like“<SharePoint URL>/Project. Read. Here we will only get the list of projects so have used the read URL and we can use it as per the operations. The redirect URL is fixed and is the one which we have added under the AD app above. Use the Tenanat ID and client ID of the AD app. When we use the user credentials then we use SharePointOnlineCredentialsclass to set the credentials. Here, in this case, we will pass the token in the request header using the Authorization header as authentication will be done using the Azure AD app. private static void GetProjectsUsingCSOM() { string domain = “abc.sharepoint.com”; string PWAUser = “abc@domain.com”; string scope = “<SharePoint URL>/Project.Read”; string redirectUri = “https://login.microsoftonline.com/common/oauth2/nativeclient”; string pwaInstanceUrl = “PWA URL”// your pwaurl var AzureTenantId = “Enter the Azure Tenant value”; var ClientID= “ClientID of Azure AD app”; //Retrieved above PublicClientApplicationBuilder pcaConfig = PublicClientApplicationBuilder.Create(ClientID .WithTenantId(TenantId); pcaConfig.WithRedirectUri(redirectUri); // This section uses to get the token Var TokenResult = pcaConfig.Build().AcquireTokenInteractive(new[] { scope }) .WithPrompt(Prompt.NoPrompt) .WithLoginHint(PWAUser).ExecuteAsync().Result; // Load project context and get projects. ProjectContext projectContext = new ProjectContext(pwaInstanceUrl); projectContext.ExecutingWebRequest += (s, e) => { e.WebRequestExecutor.RequestHeaders[“Authorization”] = “Bearer ” + TokenResult.AccessToken; }; projectContext.Load(projectContext.Projects); projectContext.ExecuteQuery(); foreach (PublishedProject Project inprojectContext.Projects) { Console.WriteLine(Project.Name); } Console.ReadLine(); } Here, one thing that happens is, it will ask for a pop-up to enter the credentials if it is not cached. In a similar way, you can perform any Project Online/Office365 OData call also. All other calls can be carried out after adding the appropriate permissions in the AD app. Happy Coding! Supriya Khamesra Supriya is currently working as a Senior Consultant – Business Applications with Advaiya and has more than 10 years of experience in application development. Microsoft Certified Professional in EPM, Supriya has extensive knowledge in technologies including – SharePoint, Enterprise Project
Why businesses lose customers: Engagement pitfalls to avoid

SharePoint App-Only is the model for setting up app-principals. This model works for both SharePoint Online and SharePoint 2013/2016 on-premises.In one of our recent PPM Implementation, we have used SharePoint app to do the CSOM Client Context authentication for azure hosted WCF service. This service includes the functionalities of multiple module automations.CSOM (Client-Side Object Model) APIs are available for developers to connect to SharePoint Online sites. Using CSOM APIs, we can connect to SharePoint Online remotely and perform desired operations. There are various ways available to connect to SharePoint Online. In this article, we will explore how we can connect SharePoint Online site with App Only Authentication. App-Only Authentication App-Only is a model for setting up app principals. It can be used with SharePoint Online, as will SharePoint on-premise (SharePoint 2013 / 2016 versions). Setup app-only principal Navigate to SharePoint site (e.g., https://tenant.sharepoint.com) Open appregnew.aspx page (https://tenant.sharepoint.com/_layouts/15/appregnew.aspx) 3. Click “Generate” button against Client Id row to generate a new client id. 4. Click “Generate” button against Client secret row to generate a new client secret. 5. Type any Title, which describes your app principal. 6. Type App domain as www.localhost.com 7. Specify redirect URI as https://www.localhost.com 8. Click Create 9. Note down the Client Id and Client Secret for future references. Grant tenant scoped permissions to the newly created principal Tenant scoped permissions can only be granted from tenant administration sites. Permission indicates the activity permitted to perform within the requested scope. The permission can be any of the below: Read Write Manage Full control Along with permission, we can specify the scope. Below are a few examples of scope. http://sharepoint/content/sitecollection http://sharepoint/content/sitecollection/web http://sharepoint/content/sitecollection/web/list http://sharepoint/content/tenant Open SharePoint Online Tenant site with Tenant Administrator account (https://tenantname-admin.sharepoint.com/_layouts/15/appinv.aspx) 2. In the App Id textbox type your generated Client Id 3. Click the Lookup button 4. In the Permission Request XML textbox type below xml, 5. Click Create button 6. In the next dialog click Trust It button, View or Delete Apps 1. Navigate to new SharePoint admin view, click on More features as below 2. Click on Open, under Apps 3. Click on App Permissions 4. Search your app with app id 5. You can click on the delete icon to delete the app. CSOM code for App Only Authentication Below is the CSOM code snippet for SharePoint app only Authentication using client ID & client secret. In case of a query, add your comments below.
How to deal with SharePoint Online list threshold?

What are boundaries and limits in SharePoint lists?Every time you access a list or a document library, there is a search query raised at the backend which returns all the results. For example, if there are 20,000 or more items in a list or document library and when you try to display them– you won’t be able to see more than 5000 items on a page/view and the list/library will run into the 5000 item limit threshold. Boundaries are absolute limits that cannot be breached. This is a design choice by Microsoft. Limits are advised guidelines that have been agreed upon and are affected by system performance. These can go beyond the suggested Microsoft limits, but there could be consequences in the performance. The situation in which this sort of protection can be deemed necessary is, if one user wants to view all the 20,000 items in the list, it will result in the slowdown of the platform for everybody else using the platform. Mostly, these boundaries or limits apply to both SharePoint Online & SharePoint On-Premise users. But the difference is; in SharePoint Online, the list thresholds place cannot be changed whereas in SharePoint On-Premise, the thresholds can be altered explicitly, but it is not recommended as it might affect the server performance. How to manage the list?In custom pages as well as for various other reporting needs, when we access data from SharePoint lists using OData, there will be a threshold limit of 5000 records when the data is vast.In order to overcome this issue and manage the list effectively, we need to create indexed columns. Indexed columns and filtered viewsIn the list/library settings, a user can create a maximum of 20 indexed columns. When we index a column, we are requesting SharePoint to make that column more available and executable in a query when compared to other columns. We should be aware that this prioritization comes at a cost, which is an increased overhead at the database level. Therefore, it is advisable to index columns that are going to be searched and filtered very frequently. The concept behind the filtering of views is to exclude irrelevant items within a list. To make a filtered view more relevant, it’s required for the first column within the list to be indexed to keep the returned rows or items below the view threshold. Steps to index columns: 1. Go to list/library settings. 2. Click on indexed column option. Multiple ways to overcome this challenge and retrieve the data from the list.OData:In OData queries, generally when querying lists items without filter, then it works fine irrespective of count of items in the list. But the problem arises when we need to add a filter in OData query based on some business requirements and when the item count in the list is more than 5000 records. It gives threshold limit error. To overcome this, we need to index columns used for filtering the results in the OData query. But, we also need to see that after filtering query over the indexed column, the result should not be greater than 5000 records else, we will have to implement more filters using indexed columns to keep count well below 5000 records. Indexing to be done in the same way as discussed above for the required columns. Example: /_api/web/lists/getbytitle(‘’)/items?$filter=Column1 eq 2In the above OData query, Column1 must be indexed column if the total number of items in the list is greater than 5000 records. CSOM section – ReadWhile working with CSOM for SharePoint list operations, the same threshold issue appears while trying to read all the items from a SharePoint list having more than 5000 records using CAML query. Here we will have to apply CAML query batch operations in order to achieve the same. Below is an example of reading a SharePoint List having more than 5000 records using CAML query. To summarize, large SharePoint lists can be managed and used effectively by indexing and below are the important points to note while indexing: We can have a maximum of 20 indexed columns per list. If we want to apply additional sorting in a view, the sort column is required to be an indexed column. Analyze the list items and check if some of them can be removed or archived to another SharePoint list. In case of any query regarding SharePoint Online list thresholds, add your comments below.
How to Update Multi-Select Task Level Custom Field Using CSOM

Requirement – In one of our recent projects on PMO Tool Implementation for a client from EPC vertical, it was required to create tasks with multiple resource assignment. The solution architecture consists of Kendo UI for the user interface, REST Service as middle layers, and Azure logic app for automating the REST Service call on schedule’s intervals. To create tasks with multiple resource assignment in the Project Plan, we passed the task details from interface and .Net based REST Service. The page looks as below. The user navigates to the page, adds new task item and on saving it gets created as a new item in the SharePoint list on that particular project site. At the end of the day, on scheduled time, the logic app triggers the WCF service method to add the newly created SharePoint list items as tasks in the project plan. Data types and fields Mapping – Problem – Here, we came across a situation where we had to update multi-select task level custom field. We tried doing this with multiple CSOM queries and logics, but we were not able to achieve it. Solution – We developed a CSOM logic code as below: This method can be followed to update the multi-select task level custom field. Author Recommended .Net Managed Client Side Object Model for Project Online How to Migrate SharePoint List Items to Project Online Need more guidance on SharePoint? Write to us to discuss how we can help you and your team become more efficient. In case of query, add your comments below.
What’s new in SharePoint Server 2019?

Looking for a reason to upgrade to SharePoint Server 2019? Below are the key highlights from the new release. SharePoint Server 2019 has been optimized to improve user experience by providing a familiar and consistent view of information. 1. User-friendly pages and Web Parts – The older versions of SharePoint pages were not so user-friendly. But with SharePoint 2019, one can quickly and easily create content. 2. SharePoint mobile – Ensures easy access to the intranet on the go and provides content-centric collaborative spaces. It hosts applications that support and automate business processes. 3. Enhanced search capabilities – Users can create files/folders and save their documents in either OneDrive or SharePoint anytime, anywhere, with improved integration between the two systems. 4. Increased storage – SharePoint 2016 supported storing files up to 10GB. Now we can store up to 15 GB. 5. The modern experience of lists and libraries – This feature allows users to pin documents, add files as links, move or copy files easily. One can quickly view information about the documents, including permissions and metadata. Another useful feature of SharePoint 2019 is the “Move To” and “Copy To” action, allowing users to quickly change the location of a document to a more appropriate one. 6. Improved integration with Office 365, SharePoint Team Sites and Microsoft Teams – Seamless integration allows team members to connect their SharePoint site to Office 365 group or merge a new team in Microsoft Teams to create a collaboration hub. This feature also lets users access SharePoint pages and news articles via Microsoft Teams. 7. Integration with PowerApps, Power BI and MS Flow – SharePoint Server 2019 has some deep integration with PowerApps, Power BI, and MS Flow. This feature brings cloud closer to the customers and results in improved performance. 8. SMTP authentication – SharePoint Server 2019 now supports SMTP authentication while sending emails. This will enable seamless email management and eliminates the test process for each outgoing mail. Another significant feature of SharePoint Server 2019 is its support for hybrid environments. The improved OneDrive Sync Client and Hybrid Configuration Wizard help SharePoint administrators and end-users to enjoy the power of cloud in their on-premises environment. If you are planning for a SharePoint migration or need help with SharePoint, you can get in touch with our team of experts.
How to access SharePoint Rest API using OAuth

This post describes the method to access Rest APIs using Open ID connect and OAuth, considering a use case.
How to migrate SharePoint server 2013 to SharePoint server 2016
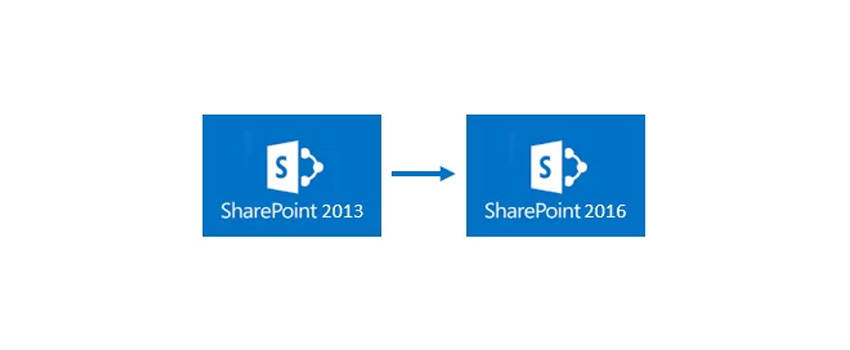

SharePoint 2016 has come with many enhancements, encouraging organizations to migrate to this latest version. This post will take you through a step by step process on how you can upgrade your SharePoint 2013 to SharePoint 2016.
Note that you can upgrade your SharePoint instance from one server to another without any downtime. As this is a live migration, I would suggest you to take complete backup of the server and the database before continuing. [ Empower executives and employees across your organization to connect, converse, discover and work together at one central location to save time, increase productivity and boost engagement Know more at: Employee Intranet ]
If you are running SharePoint 2010 and want to migrate, there is no method to migrate it directly to SharePoint 2016.

Here are the steps that you need to follow:
- Create SharePoint 2013 farm
- Attach SharePoint 2010 database to SharePoint 2013 farm
- Upgrade site collections to full SharePoint 2013 mode
- Create a new SharePoint 2016 farm
- Attach SharePoint 2013 database to SharePoint 2016 database server
Here I am assuming that you have done all the prerequisites before starting this migration process. That means you’ve already installed SharePoint 2016 server, but if you are finding difficulty to do so, you can follow my previous post here.
Also, before starting the process go to your old SharePoint 2013 database Server, copy the WSS_Content content database of your site collection (which you want to migrate to SharePoint 2016) to the new SharePoint 2016 database server.
- Login to your old SQL Server Management Studio, select WSS_content ,go to task, and select copy database.
- You will get a database copy wizard. Click on Next.
- Verify source server properties.
- Select the destination Server where you want to copy this WSS_contect DB.
- In select the transfer method wizard, use SQL Management Object method if you want to do the migration without down time.
- Select a database to copy. Select WSS_Content. Click on Next.
- Configure the properties of a destination database.
- Select Logins here.
- Configure the package created.
- Select Run immediately option. If you need to schedule them, select Schedule option.
- Review the summary and click on Finish.
- It will take a while to perform the operation.
- Once the database is restored, go back to your SharePoint 2016 Central Administration and setup your SharePoint Web Application to use the copied WSS_Content database. Go to Application Management -> Manage Web Applications.
- Create a new web application.
- Set new web application properties.
- Once the new application is created, open the SharePoint powershell as the administrator and run below commmands:


- Test your content database using command
- Dismount the new database which is created by detault when the site collection is created.
- Run the cmdlet to attach SharePoint 2013 content database to new SharePoint 2016 site collection.
- The upgrade will take 10 to 15 minutes to complete, and sometimes even an hour. Once it is completed, you will get a message like below:
- If your SharePoint site has a customized web solution, then run cmdlet to add SP solution
- After adding SP solution, we need to install this solution to our newly created web application use cmdlet:
Test-SPContentDatabase -Name <database name> -Web Application <Web application name>
Dismount-SPContentDatabase "<Db Name>"
Mount-SPContentDatabase "WSS_Content_Home" -DatabaseServer “IN-SRV05” – WebApplication http://aspl-collab04/


Add–SPSolution C:Service.wsp ( Path of wsp solution)

Install-SPSolution –Identity Service.wsp –WebApplication http://aspl-collab04/ –GACDeployment
And there you are! Now open your updated SharePoint site. Like you can see Advaiya’s updated SharePoint site as below:
