In this post, I’m going to discuss about WCF service and how it can be developed on top of SharePoint. WCF service works as an individual component that can be hosted on any environment and has no platform dependencies. WCF service plays a major role in SharePoint app based development model by enabling access where the SharePoint app has limited access controls. Let’s see how we can develop WCF service on SharePoint through a custom solution on Visual Studio.
But before that I would like to introduce WCF and it’s building blocks.
What is WCF?
Windows Communication Foundation(WCF) is a framework launched by Microsoft with the release of .Net 3.0. The two main building blocks for WCF services are – distributed and interoperable:
Distributed
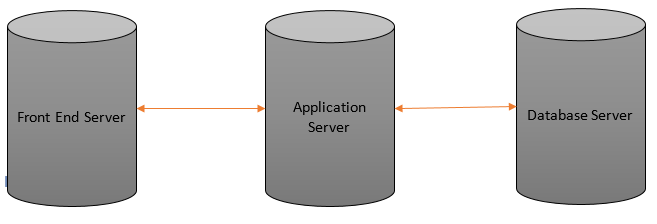
In this concept the application components run on different servers through network. It mainly gets used for better scalability of the server. A web application which is running on one machine can leverage the WCF service hosted on some other server.

Interoperable
Interoperable means the application can communicate with any other application with different platform, so there’s no platform dependency. Previously .Net remoting service was getting used but only with the .Net applications because of which Microsoft came up with WCF services to overcome platform dependencies.
WCF On SharePoint 2016
Here I’m sharing the steps to develop WCF service on top of SharePoint 2016:
Step1: Open Visual Studio 2015 and create new SharePoint 2016 empty project.

Step 2: Name the project as SPWCFService and click OK.
Step 3: Provide the SharePoint web application URL and select Deploy as Farm solution radio button.

Step 4: Add following references on solution:
a. Microsoft.Office.Server.UserProfiles
b. Microsoft.SharePoint
c. Microsoft.SharePoint.Clieint.ServerRuntime
d. System.ServiceModel
e. System.ServiceModel.Web
f. System.DirectoryServices
g. System.Configuration
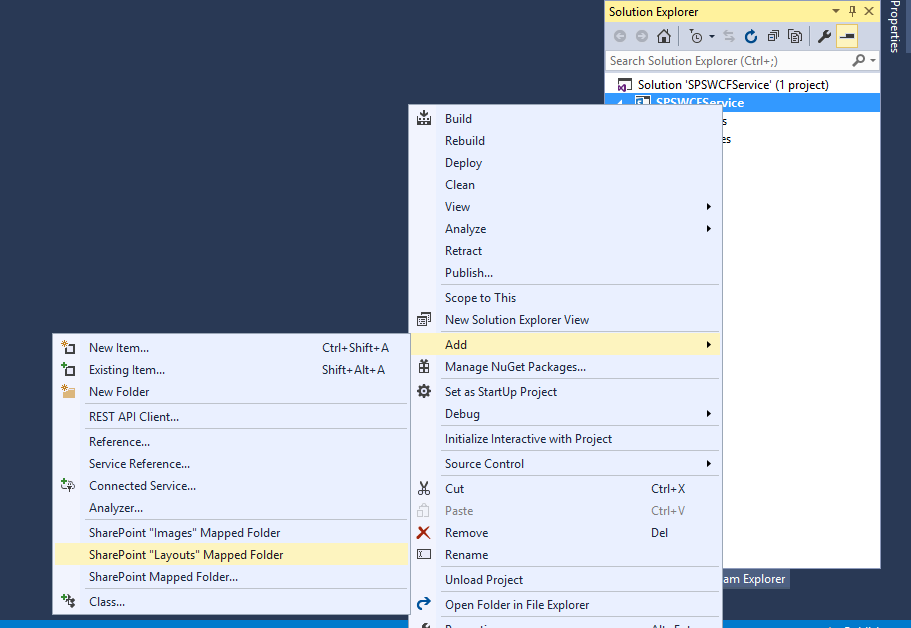
Step 5: To create the service, add our Layouts folder in solution. Write click on Project and select Add > SharePoint ‘Layouts’ Mapped folder option.

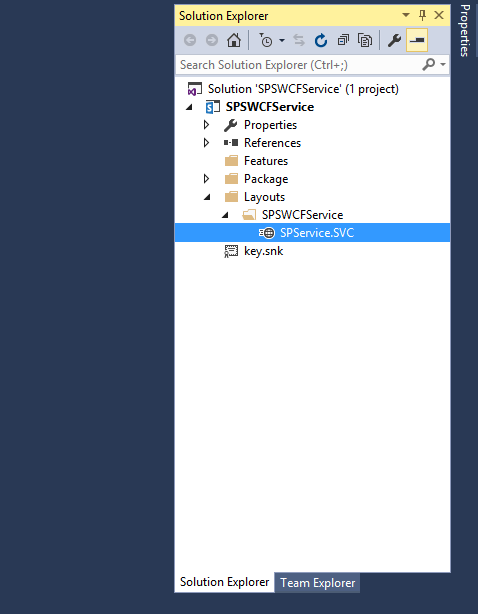
Step 6: Once Layouts folder gets added Add one txt file in it named as ‘SPService.txt’. Rename the it as .SVC.

Step 7: Add the following line of code in the SVC file we have added in the last step:
@ServiceHost%20language=%22C#”>%@ServiceHost language=”C#” Factory=”Microsoft.SharePoint.Client.Services.MultipleBaseAddressDataServiceHostFactory, Microsoft.SharePoint.Client.ServerRuntime, Version=15.0.0.0, Culture=neutral, PublicKeyToken=71e9bce111e9429c” Service=”SharePoint. SPWCFService.Sample.Code.SampleService”
Step 8: Now let’s add one folder in the solution named as ‘Code’ and add two classes in it named as ‘ISampleService.cs’ and ‘SampleService.cs’. Modify both the classes with the below code in it:
ISampleService.cs
using System;
using System.Collections.Generic;
using System.Linq;
using System.Text;
using System.Threading.Tasks;
using System.ServiceModel;
using System.ServiceModel.Web;
namespace SharePoint.SPWCFService.Sample.Code
{
[ServiceContract]
public interface ISampleService
{
[OperationContract]
[WebInvoke(Method = “GET”,
ResponseFormat = WebMessageFormat.Xml,
BodyStyle = WebMessageBodyStyle.Wrapped,
UriTemplate = “SampleServiceCall({SampleValue})”)]
string SampleServiceCall(string SampleValue);
}
}
SampleService.cs
using System;
using System.Collections.Generic;
using System.Linq;
using System.Text;
using System.Threading.Tasks;
using System.ServiceModel;
using System.ServiceModel.Web;
using System.ServiceModel.Activation;
using Microsoft.Office.Server.Social;
using Microsoft.Office.Server.UserProfiles;
using Microsoft.Office.Server.Microfeed;
using Microsoft.SharePoint;
using Microsoft.Office.Server.ReputationModel;
using Microsoft.Office.Server.SocialData;
using System.Configuration;
using System.Security.Principal;
using System.Web;
using Microsoft.Web.Hosting.Administration;
namespace SharePoint.SPWCFService.Sample.Code
{
[AspNetCompatibilityRequirements(RequirementsMode = AspNetCompatibilityRequirementsMode.Allowed)]
public sealed class SampleService : ISampleService
{
public string SampleServiceCall(string itemId)
{
string statusResult = “”;
try
{
using (SPSite SpSite = new SPSite(ConfigurationManager.AppSettings[“SiteUrl”].ToString()))
{
SPWeb cWeb = SpSite.RootWeb;
SPList accReqList = cWeb.Lists[“List”];
SPListItem item = accReqList.GetItemById(Convert.ToInt32(itemId));
statusResult = item[“Title”].ToString();
}
}
catch (Exception ex)
{
statusResult = ex.Message;
}
return statusResult;
}
}
}
Step 9: As you can see in the above two classes – one is our Interface ‘ISampleService.cs’ and another is declaration class ‘SampleService.cs’ for the interface.
Step 10: We also need to modify our Web Application config for an entry of SiteUrl in appSettings as we have used it in our code above ‘SampleService.cs’ class.
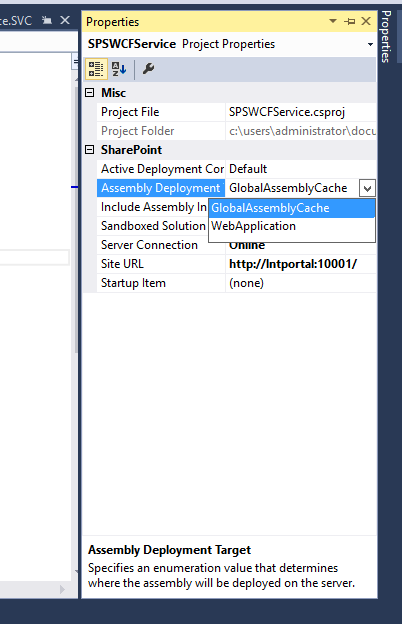
Step 11: We need to modify the project Assembly Deployment value from GAC to WebApplication.


Step 12: Deploy the solution.
Step 13: We can make the service call through the below URL and can test the service:
http://{SiteUrl}/_layouts/15/SPWCFService/SPService.svc/SampleServiceCall({ItemID})
Step 14: The expected result will be in the below format:

And there you are!


