From the time Sitecore 9 was released, there has been a lot of talk about the method of installation. Installing Sitecore 9 is difficult when compared to installing the previous versions, and in this version, you will be using a lot more Powershell.
When I was trying to install Sitecore 9.0 in my system, I had to go through multiple website and videos to learn the method. To simplify this process, I have mentioned the steps to be followed for installation of Sitecore 9.0 on a local development environment.
Sitecore Experience Marketing Demystified
a. Windows 8.1, 10, Server 2012 R2
b. .NET Framework 4.6.2
c. SQL Server 2016 or greater
d. IIS 8.5 or 10
e. Java Runtime Environment (JRE)
f. Power Shell 5.1+
g. Web Platform Installer 5.0
h. Web deploy 3.6
i. Solr 6.6.2
j. NSSM
Steps 1
1. Gather Files:
a. Sitecore License file
b. On-Prem XP0 Instance package: Sitecore 9.0.2 rev. 180604(download from here)
Step 2
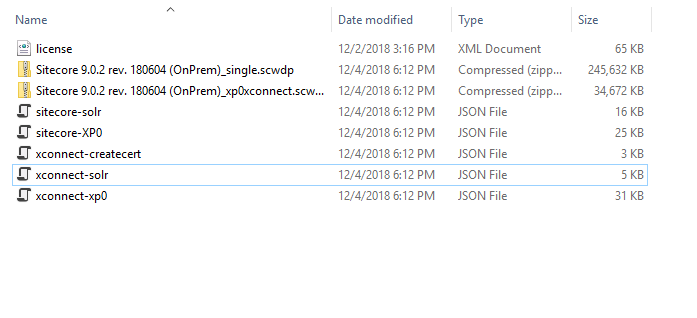
• Create install folder c:/Siteocore/install
• Move license file to install folder
• Extract ZIP file (Sitecore 9.0.2 rev. 180604) and move below file to install folder
1: Sitecore 9.0.2 rev. 180604 (OnPrem)_single.scwdp.zip
2: Sitecore 9.0.2 rev. 180604 (OnPrem)_xp0xconnect.scwdp.zip
3: Extract XP0 Configuration files 9.0.2 rev. 180604.zip file and move all its json file to install folder
• Extract Solr 6.6.2.zip file and move to C:/Sitecore folder
• Open PowerShell as administrator and move to C:Sitecoresolr-6.6.2bin directory
• Run powershell command:
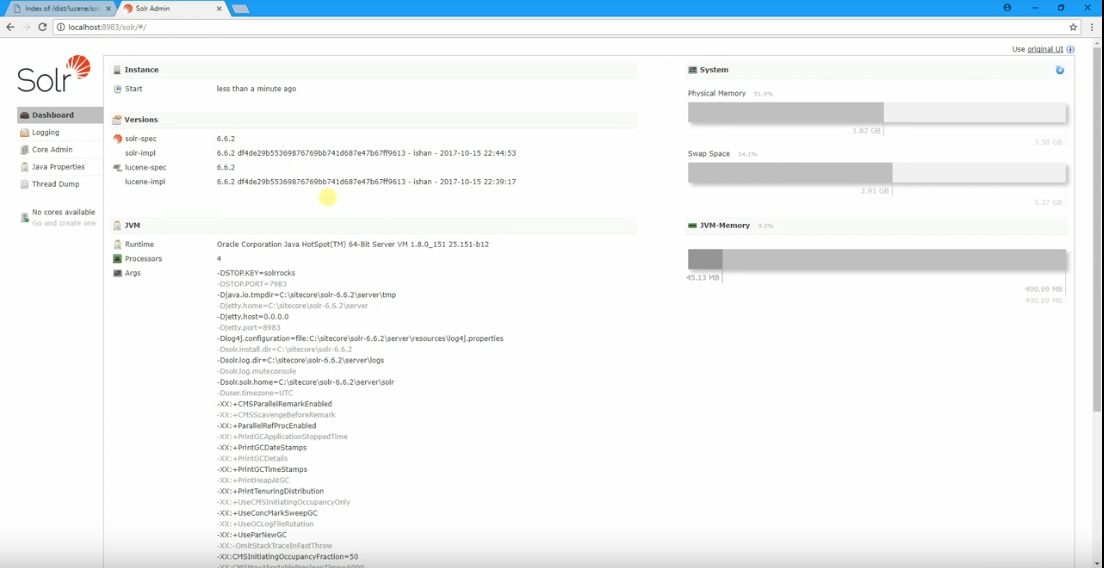
o .Solr start -p 8983
• Open browser with URL http://localhost:8983/Solr and check solr is running properly
Step 4
• Set up solr as service
o Download from http://nssm.cc
o Install to C:/Sitecore folder
o Open Command Prompt as admin and navigate to C:Sitecorenssmwin64
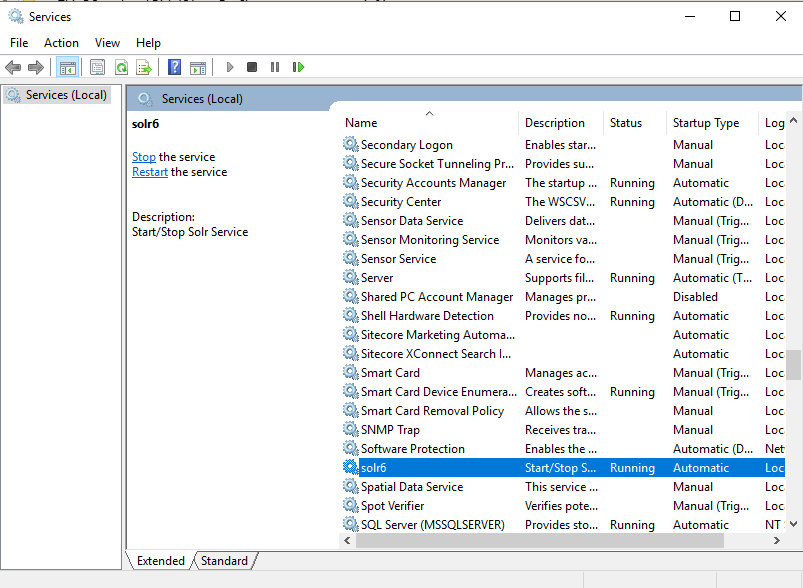
o Run PS command: nssm install solr6
Under Application Tab fill values:
• Path: C:Sitecoresolr-6.6.2binSolr.cmd
• C:Sitecoresolr-6.6.2bin
• Argument: start -f -p 8983
Under Details Tab fill values
• Name: Solr6
• Description: Start/Stop Solr Service
Click Install Service button
o Open Service Manager to check Solr6 service is created and then start the service
Step 5:
Configure SSL for solr:
• Download solrssl.ps1 from here
• Move solrssl.ps1 file to install folder C:/Sitecore/Install
• Edit the solrssl1.ps1 file
o Open the file in editor
o Navigate to
$keytool = (Get-Command ‘keytool.exe’).Source
o Set the location of keytool.exe to
$keytool = (Get-Command ‘C:Program FilesJavajre1.8.0_191binkeytool.exe’).Source
• Open the PowerShelland navigate to C:/Sitecore/Install and run the command
.solrssl.ps1 -KeystoreFile C:Sitecoresolr-6.6.2serveretcsolr-ssl.keystore.jks
o Open C:Sitecoresolr-6.6.2binsolr.in.cmd in editor and Search for this line and remove REM
REM set SOLR_SSL_KEY_STORE=etc/solr-ssl.keystore.jks
REM set SOLR_SSL_KEY_STORE_PASSWORD=secret
REM set SOLR_SSL_KEY_STORE_TYPE=JKS
REM set SOLR_SSL_TRUST_STORE=etc/solr-ssl.keystore.jks
o Restart solr service
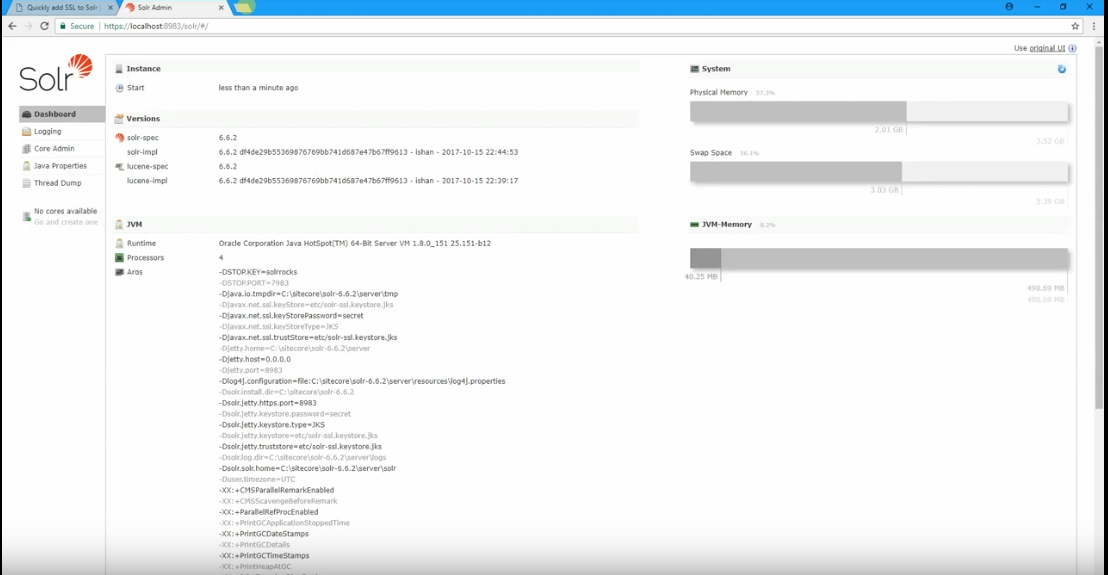
o Now run solr as https
https://localhost:8983/solr
Step 6
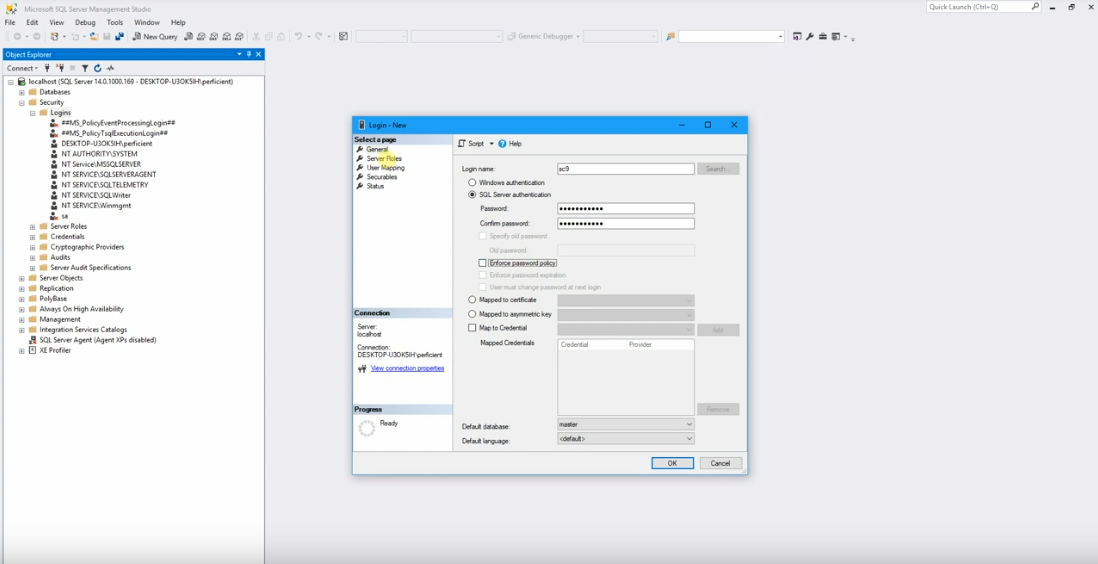
Setup SQL Server User
• Create a user with new User and provide Sysadmin server role
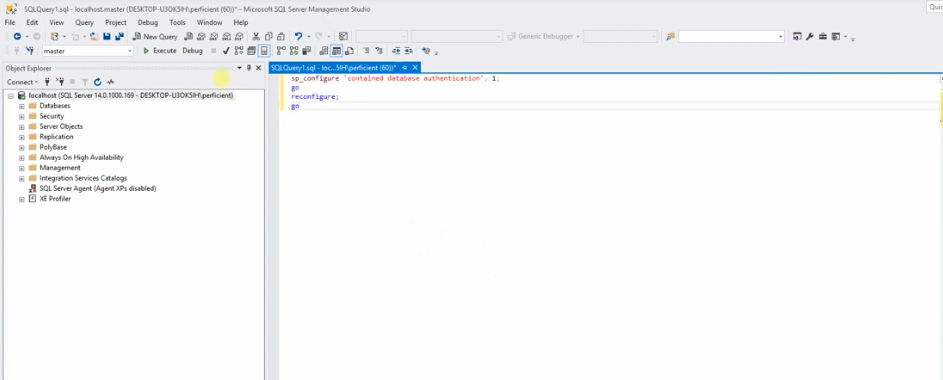
• Execute below code
sp_configure ‘contained database authentication’, 1;
GO
RECONFIGURE;
GO
Step 7
Install the SIF Module
• Open the Powershell as administrator and run below command
Register-PSRepository -Name SitecoreRepo -SourceLocation https://sitecore.myget.org/F/sc-powershell/api/v2
Install-Module SitecoreInstallFramework -RequiredVersion 1.1.0
Install-Module SitecoreFundamentals -RequiredVersion 1.1.0
Import-Module SitecoreFundamentals
Import-Module SitecoreInstallFramework
Step 8
Run Installation Script
• Update the parameter in all the script and then run:
o $prefix: name of Sitecore instance
o $SqlServer: Sql server name
o $SqlAdminUser, $SqlAdminPassword: User created in Step 6
Script 1:
#define parameters
$prefix = “xp1”
$PSScriptRoot = “C:Sitecoreinstall”
$XConnectCollectionService = “$prefix.xconnect”
$sitecoreSiteName = “$prefix.local”
$SolrUrl = “https://localhost:8983/solr”
$SolrRoot = “C:Sitecoresolr-6.6.2”
$SolrService = “solr6”
$SqlServer = “DESKTOP-K34H1RL”
$SqlAdminUser = “sc9”
$SqlAdminPassword=”pass@word1″
#install client certificate for xconnect
$certParams = @{
Path = “$PSScriptRootxconnect-createcert.json”
CertificateName = “$prefix.xconnect_client”
}
Install-SitecoreConfiguration @certParams -Verbose
#install solr cores for xdb
$solrParams = @{
Path = “$PSScriptRootxconnect-solr.json”
SolrUrl = $SolrUrl
SolrRoot = $SolrRoot
SolrService = $SolrService
CorePrefix = $prefix
}
Install-SitecoreConfiguration @solrParams
#install solr cores for sitecore
$solrParams = @{
Path = “$PSScriptRootsitecore-solr.json”
SolrUrl = $SolrUrl
SolrRoot = $SolrRoot
SolrService = $SolrService
CorePrefix = $prefix
}
Install-SitecoreConfiguration @solrParams
Script 2:
#define parameters
$prefix = “xp1”
$PSScriptRoot = “C:Sitecoreinstall”
$XConnectCollectionService = “$prefix.xconnect”
$sitecoreSiteName = “$prefix.local”
$SolrUrl = “https://localhost:8983/solr”
$SolrRoot = “C: Sitecoresolr-6.6.2”
$SolrService = “solr6”
$SqlServer = “DESKTOP-K34H1RL”
$SqlAdminUser = “sc9”
$SqlAdminPassword=”pass@word1″
#install client certificate for xconnect
$certParams = @{
Path = “$PSScriptRootxconnect-createcert.json”
CertificateName = “$prefix.xconnect_client”
}
Install-SitecoreConfiguration @certParams -Verbose
#deploy xconnect instance
$xconnectParams = @{
Path = “$PSScriptRootxconnect-xp0.json”
Package = “$PSScriptRootSitecore 9.0.2 rev. 180604 (OnPrem)_xp0xconnect.scwdp.zip”
LicenseFile = “$PSScriptRootlicense.xml”
Sitename = $XConnectCollectionService
XConnectCert = $certParams.CertificateName
SqlDbPrefix = $prefix
SqlServer = $SqlServer
SqlAdminUser = $SqlAdminUser
SqlAdminPassword = $SqlAdminPassword
SolrCorePrefix = $prefix
SolrURL = $SolrUrl
}
Install-SitecoreConfiguration @xconnectParams
Script 3:
#define parameters
$prefix = “xp1”
$PSScriptRoot = “C:Sitecoreinstall”
$XConnectCollectionService = “$prefix.xconnect”
$sitecoreSiteName = “$prefix.local”
$SolrUrl = “https://localhost:8983/solr”
$SolrRoot = “C: Sitecoresolr-6.6.2”
$SolrService = “solr6”
$SqlServer = “DESKTOP-K34H1RL”
$SqlAdminUser = “sc9”
$SqlAdminPassword=”pass@word1″
#install client certificate for xconnect
$certParams = @{
Path = “$PSScriptRootxconnect-createcert.json”
CertificateName = “$prefix.xconnect_client”
}
Install-SitecoreConfiguration @certParams -Verbose
#install sitecore instance
$xconnectHostName = “$prefix.xconnect”
$sitecoreParams = @{
Path = “$PSScriptRootsitecore-XP0.json”
Package = “$PSScriptRoot Sitecore 9.0.2 rev. 180604 (OnPrem)_single.scwdp.zip”
LicenseFile = “$PSScriptRootlicense.xml”
SqlDbPrefix = $prefix
SqlServer = $SqlServer
SqlAdminUser = $SqlAdminUser
SqlAdminPassword = $SqlAdminPassword
SolrCorePrefix = $prefix
SolrUrl = $SolrUrl
XConnectCert = $certParams.CertificateName
Sitename = $sitecoreSiteName
XConnectCollectionService = “https://$XConnectCollectionService”
}
Install-SitecoreConfiguration @sitecoreParams
After Successfully running below scripts, you can access Sitecore site using http://xp1.local URL

This method can be followed for installation of Sitecore on a local development environment. You can also view Sitecore Multisite Architecture – Single Installation. In case of query, add your comments below.


